About Us
Our meat is always fresh, hand-cut, delicious and prepared with care. We pride ourselves on the quality of meat we sell to our customers because we value you!
Contact Info
- 110/400 Newmarket Road, Newmarket QLD 4051
- +0738564216
- 110/400 Newmarket Road, Newmarket QLD 4051
- +0738564216
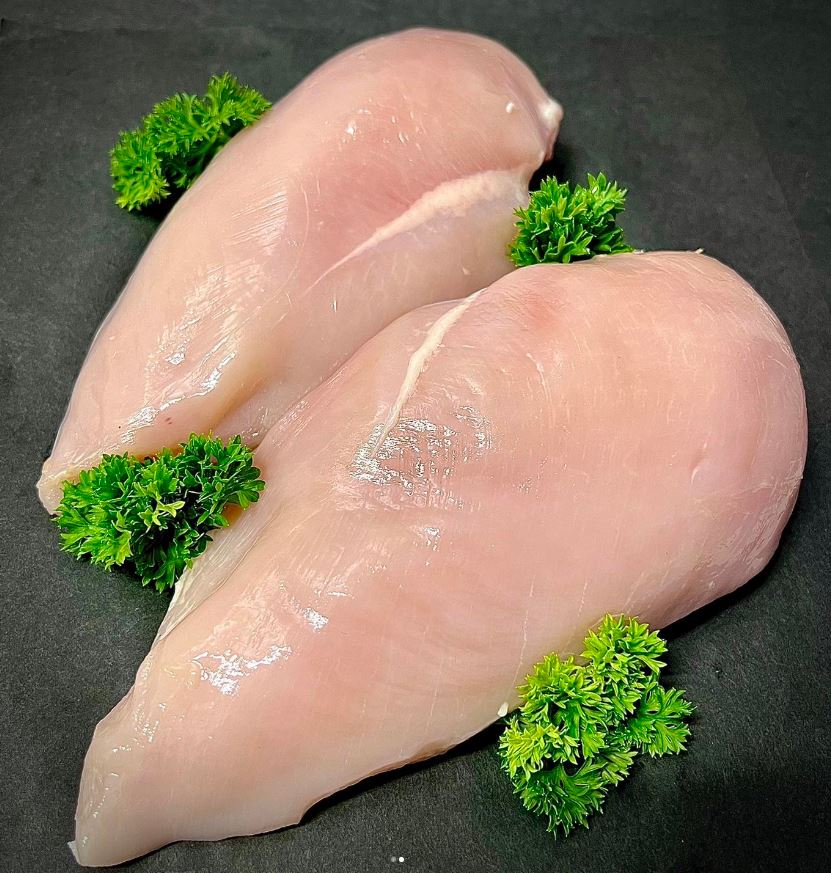
Techniques for Juicy and Tender Chicken Breasts
Why Chicken Breasts Often Turn Out Dry
Chicken breasts can easily end up dry because they’re very lean and have little fat to keep them moist. Unlike fattier cuts (like thighs), even a slight overcook will make a chicken breast go from juicy to “jerky” – it’s delicate stuff. Home cooks often cook chicken breasts too long or at too high a temperature, causing the muscle fibers to squeeze out moisture.
Typical mistakes include not using a thermometer, not letting the meat rest, or cooking unevenly sized pieces. The result: tough, dry meat that needs a dash of sauce to salvage. The good news? Understanding what makes white meat dry is the first step to flipping the script – and getting juicy, tender free-range chicken breasts every time.
Understanding Chicken Breast Texture and Moisture
Anatomy of a Chicken Breast
The chicken breast is the large pectoralis muscle of the bird. It’s white meat composed of fast-twitch fibers, meaning it’s built for quick bursts rather than endurance. It has very little intramuscular fat or connective tissue. This low fat content means the meat itself isn’t naturally juicy, so it relies on cooking technique and added moisture.
In practical terms, white meat won’t have a rich fat marble like beef or even dark chicken cuts. You can think of it as mostly protein “fibers” packed tight. Because of that structure, the breast needs help (marinade, careful cooking, etc.) to stay moist. Without a protective layer of fat or a steamy cooking environment, the interior moisture can quickly evaporate under heat.
Why Lean Meat Dries Out Easily
Because chicken breast is so lean, its protein fibers themselves lose their juices at relatively low temperatures. In other words, once you heat white meat, it quickly begins pushing water out of the cells. As the meat cooks, the muscle fibers contract and literally squeeze out moisture. Overdo it, and you get stringy, dry bites.
This is why chefs often say white meat “doesn’t have a margin for error.” By contrast, dark cuts like thighs have more fat and collagen, so they stay juicy even with longer cooking. The takeaway: chicken breasts need precise timing and sometimes extra liquid (marinade or sauce) to remain succulent. Also, while food safety guidelines say 74°C (165°F) is safe, you often want to pull chicken off heat a few degrees earlier to keep it moist and then let it finish off-heat (carryover cooking).
Common Cooking Mistakes to Avoid
- Overcooking without checking temperature. Guessing done-ness is unreliable – always aim for just cooked through (use a thermometer to 74°C/165°F, or slightly less and rest).
- Skipping the rest period. Cutting into a hot breast right away causes the juices to spill out. Let cooked meat sit 5–10 minutes before slicing.
- Uneven thickness. Thicker parts will overcook while thinner parts finish. Failing to pound or butterfly your breasts leads to uneven doneness.
- Wet surface. Putting damp chicken into a hot pan causes it to steam, not sear. Always pat the chicken dry first to get a good crust.
- Overcrowding the pan. If chicken pieces are touching or stacked, they’ll steam instead of brown. Give each piece room.
- No seasoning. Untouched chicken tastes bland. Salt (and other seasonings) not only flavor but also help proteins retain moisture. Neglecting seasoning can force you to add moisture later via sauces.
- High heat all the way through. Cooking at extremely high heat can char the outside before the inside is done, again leading to dryness. Start hot for sear, then lower heat to finish.
Avoid these pitfalls and you’re already halfway to tender chicken!
Prepping Chicken Breasts for Juiciness
Proper Trimming and Sizing
First, trim off any excess fat, gristle, or visible connective tissue (often a strip of tough tendon on the underside). Removing these tough bits makes the meat easier to season and eat.
Next, consider splitting or trimming very large breasts. Home-cooked breasts vary widely in size – a double-thick 300g breast may take twice as long to cook as a 150g one. For consistent results, trim or butterfly so pieces are similar. You can also slice really big breasts in half horizontally (butterfly) or cut one breast into two thinner cutlets. The goal is uniform thickness so each piece cooks evenly. If you have very uneven breasts, pound them flat (see next section).
Pounding Chicken for Even Thickness
Using a meat mallet or rolling pin to gently pound chicken to even thickness is a proven trick. Lay the breast between sheets of cling wrap or in a plastic bag to protect your counter, and flatten to about 1–1.5 cm (½ inch). This not only ensures even cooking, but also tenderizes the meat by physically breaking up muscle fibers slightly.
Flattening means the whole breast will hit safe temperature at the same time, so you avoid overcooking the thin end while waiting for the thick end. After pounding, another pro tip is to pat the surface dry before seasoning – again, dry meat sears instead of steams.
Marinating vs. Brining: Which Works Better?
Marinating and brining both infuse the meat with moisture and flavor, but they work in different ways. A marinade is typically an acidic or oil-based liquid (citrus juice, vinegar, yogurt, etc. plus spices) that you soak the chicken in. Brining uses a salty water solution (often with sugar and herbs). The table below highlights the main differences:
| Marinating | Brining | |
| Main ingredients | Acid (vinegar, citrus) + oil, herbs, and spices | Salt (and often sugar) dissolved in water (with herbs/spices) |
| Purpose | Imparts surface flavor and some tenderization (acid breaks down tissue). Mainly adds taste. | Primarily moisture retention. Salt dissolves muscle proteins, reducing moisture loss and making meat juicier. |
| Effect | Coats meat and slightly tenderizes. Makes flavor stick to outside. | Penetrates meat, seasoning it internally. |
| Time | Usually short (30 min to a few hours). Strong acids need only a little time. | Longer (several hours to overnight) so salt fully hydrates the cells. |
| When to use | Great for quick flavor (esp. grilled or pan-cooked breasts). | Best for larger pieces or when you want guaranteed moisture in every bite. |
In practice, a marinade adds lots of flavor on the surface and some tenderization from its acid, whereas a brine works more deeply to plump the meat with water and salt. For chicken breasts, many cooks will opt to brine first if they have time (it yields very juicy results) and then add a quick marinade or rub just before cooking for extra flavor.
Cooking Methods for Maximum Tenderness
Pan-Searing with Butter Basting
Pan-searing is a quick way to lock in juices and build a flavorful crust. Start by heating a skillet over medium-high heat and adding a little oil. Once the pan is very hot, place the seasoned chicken (skin-side or smooth side down) and don’t move it for the first few minutes.
This creates a golden-brown crust. After flipping, it’s time for the butter baste. Add a knob of butter (and fresh aromatics like garlic, thyme or rosemary if you like). As the butter foams, tilt the pan and use a spoon to continuously pour the melted butter over the chicken. This not only browns the nutty milk solids, it also bastes the surface in hot fat, helping to keep it moist.
Once an instant-read thermometer reads about 70–75°C (160–165°F) in the thickest part, remove the chicken and let it rest (covered loosely). The whole process takes only about 8–12 minutes for a normal breast, and results in a juicy center with a deliciously crusty exterior.
Oven-Baking at the Right Temperature
Baking chicken breasts in the oven is a hands-off way to get juicy meat — if you do it correctly. The secret is relatively high heat and short time, to caramelize the outside quickly and avoid drying the inside. For example, baking at 220°C (425°F) for only 18–20 minutes yields a nicely browned crust while keeping the inside tender. After about 15–20 minutes at 200–220°C, start checking the temperature. You want to pull the breast when an instant-read thermometer hits ~74°C (165°F). (Many cooks will remove it around 70–72°C and let the carryover heat finish it, to prevent overshoot.) Also, resting is still crucial. Tent the hot chicken under foil for a few minutes before slicing.
Avoid lower temps/longer times (like 180°C for 30+ min), which tend to dry out white meat. Instead, go hot and quick for tender results.
Poaching for Moisture Retention
Poaching is perhaps the most foolproof method for moist chicken breast. In poaching, you submerge skinless, boneless chicken in a flavorful liquid (water, broth, wine, or even milk) at a low temperature — just under or at a gentle simmer. Unlike grilling or searing, which exposes chicken to intense heat, poaching is gentle and cooks the meat slowly and evenly. This prevents the muscle fibers from seizing up.
To poach chicken, place your breasts in a pot with plenty of liquid to cover by an inch. Start with cold seasoned liquid (water plus aromatics like onion, garlic, peppercorns, herbs, and salt). Gradually heat to a bare simmer, then reduce to the lowest heat setting and cover. Maintain it just under a simmer for about 10–15 minutes, or until the thickest part of the chicken reaches safe temperature. Some chefs remove the pot from heat and let it continue to steam in the closed pot for a few minutes. Either way, when it’s done, immediately transfer the breasts to a plate and let them rest uncovered for 5+ minutes. This resting allows the juices to redistribute (and any residual pinkness to fade slightly). The result: evenly-cooked, tender chicken.
Grilling Without Drying Out
Grilling chicken breasts can yield great flavor, but it’s easy to overcook them. The trick is to use a combination of direct and indirect heat. Start by preheating the grill to medium (about 200°C/400°F). Pat your free-range chicken breasts dry, season or marinate them, and place them on the grill over the hot flames. Grill them directly for about 4–5 minutes per side to get nice grill marks and a sealed crust.
Then move the chicken to indirect heat (an unlit section of the grill) for another 5–7 minutes. This gentler heat finishes cooking the interior without burning the exterior. Importantly, remove the chicken from the grill at around 70–72°C (160–160°F) and let it rest; the residual heat will carry it up to 74°C (165°F) as it rests. Pulling it off a few degrees early prevents overshooting and overcooking (165°F is safe, but that’s after rest). This approach makes sure the grilled chicken stays moist.
A few other grilling tips: Clean, oil the grates well to prevent sticking; cook at moderate heat (not scorching), and consider a marinade or brine beforehand for extra protection. Avoid pressing down (that squeezes out juices) and don’t constantly flip — one turn halfway through is enough. By searing first and finishing with indirect heat, and by resting the meat before slicing, you’ll end up with juicy, smoky chicken rather than dry charred strips.
Using a Slow Cooker or Instant Pot
Both slow cookers (Crock-Pots) and pressure cookers (Instant Pots) can yield very tender chicken, but they require different techniques:
- Slow Cooker: This is the “low and slow” method. Use the LOW setting and cook for about 4–5 hours (or HIGH for 2–3 hours) until the chicken reaches 74°C. Because it cooks at a low water temperature (<100°C), the meat’s juices are retained. For juicy slow cooker chicken, some cooks put broth or sauce in with the chicken so it never cooks dry. A slow cooker simply can’t get so hot that it over-squeezes the muscle fibers. Just be careful not to overcook (even in a slow cooker, hours beyond needed can dry out chicken). A rule of thumb: Cover and cook until the chicken registers 165°F (about 74°C), or between 4 to 5 hours on low, or 2 to 3 hours on high. Keep the lid on (don’t peek) so you don’t lose moisture. The result is tender meat that’s easy to shred and full of flavor from whatever liquid and seasonings you chose.
- Instant Pot / Pressure Cooker: A pressure cooker raises the temperature of cooking and drastically cuts time. For boneless chicken breasts, put about 1 cup of liquid (water, broth, or juice) in the pot, place the chicken on a trivet, season, then pressure-cook on HIGH for roughly 8–10 minutes for fresh breasts (10–12 minutes if frozen). After cooking, allow the pot to naturally release pressure for 5 minutes, then quick-release the rest. This gentle release helps keep the meat from collapsing. Ensure the chicken reaches 74°C (165°F) – you can check with a thermometer. One tip from Instant Pot users: cook chicken on a rack/trivet so it steams above the liquid rather than boiling in it. That way it stays moist and doesn’t get waterlogged. Overall, Instant Pot chicken comes out very tender because it cooks quickly under pressure; just be careful not to overcook.
In summary, either gadget works well if used correctly. Slow cooker = very slow heat, long time, great for set-and-forget meals. Instant Pot = high pressure, short time, great for quick tender results. Both will give moist, fall-off-the-fork chicken if you don’t exceed the cook time.
Flavor-Enhancing Techniques
Dry Rubs and Seasonings
Before cooking, seasoning is your best friend for flavor. A dry rub is simply a blend of spices and herbs rubbed onto the surface of the meat. Common rub ingredients include salt, pepper, garlic powder, paprika, onion powder, and various dried herbs. Unlike a liquid marinade, a rub forms a crust when cooked and deeply flavors the exterior.
For chicken breasts, a simple rub could be salt, pepper, garlic, and paprika on each side. The salt in the rub also helps the meat hold moisture. Apply rubs at least 10–15 minutes before cooking (or longer in the fridge) so they have time to adhere. A well-seasoned crust adds texture and taste, which makes the eating experience more satisfying even though the chicken itself is lean.
Sauces, Glazes, and Marinades
Cooking isn’t just dry heat; sauces and glazes can keep chicken moist and add flavor during or after cooking. A simple approach is to baste the chicken with a sauce or butter mixture near the end (as we did with butter). For example, a garlic butter sauce (melted butter with minced garlic and lemon) can be spooned over grilled or roasted breast. Sticky glazes — like a mix of honey and mustard, or a sweet-spicy barbecue glaze — can be brushed on near the end of baking or broiling to create a glossy, flavorful coating that locks in moisture.
Marinades (covered earlier) can also serve as a sauce if you reserve some (never the raw marinade!) and simmer it to pour on the chicken. Or make a quick pan sauce by deglazing the skillet with wine or broth after searing, adding aromatics and a pat of butter. This gives you a drizzle to spoon on at serving time. Think garlic butter, teriyaki, chimichurri, or pesto — all these add an extra layer of moisture and taste, making the chicken seem juicier and more indulgent.
Herbs, Aromatics, and Infused Oils
Fresh ingredients can infuse chicken with delicate flavors. During cooking or immediately after, tuck herbs like rosemary, thyme, or sage under or on top of the chicken. Throw in whole garlic cloves, sliced onion, or citrus segments (lemon or orange slices) into the pan or poaching liquid.
Their steam and oils will subtly penetrate the meat. For example, when butter-basting, you can add a sprig of thyme or rosemary to the melted butter. Even after cooking, simply garnishing with chopped fresh parsley, basil, or cilantro can brighten the flavor.
Another idea: use flavored oils or citrus zests. A dash of olive oil mixed with minced garlic and paprika makes a quick infusion on the raw chicken. Or toss cooked chicken with a drizzle of chili oil or lemon juice. These small touches of aromatics and herbs deliver big flavor that make the chicken taste more lush and moist, without adding much fat.
Tools and Equipment That Help
Meat Thermometers
One of the simplest investments for perfect chicken is an instant-read meat thermometer. Guesswork leads to over- or under-cooking, so a thermometer takes the guess out of it. Stick it into the thickest part of the breast; when it reads 74°C (165°F), you know it’s safe and done. Better yet, some pros pull chicken at around 70–72°C (160–162°F) and let it rest off heat (it will rise the rest of the way during the resting period). This avoids the dryness of overshooting 165°F on the grill or in the oven. Trust the probe, not your imagination – you’ll consistently get juicier results.
Cast Iron Skillets vs. Nonstick Pans
Cast Iron: A cast-iron skillet can hold very high heat and sear beautifully, making it great for getting a brown crust on chicken. It heats slowly, but once hot it retains that heat, which helps even cooking. It’s oven-safe too (so you can sear on stove, then pop it in the oven). Downsides: it’s heavy, and you need to season it with oil or butter to maintain the surface.
Nonstick Pan: Nonstick pans heat up quickly and have a slick surface that makes cleanup easy and usually requires less added fat. They’re ideal for delicate chicken or sticky marinades. However, nonstick coatings aren’t meant for very high heat (they can degrade around 200°C/400°F or above), and you can’t use metal utensils on them. They’re also usually not oven-safe at high temps.
In short, if you want a killer sear and don’t mind extra weight, cast iron is the champ. If you prefer easy handling and gentle cooking, a good nonstick skillet will do. The table below compares them:
| Feature | Cast Iron | Nonstick |
| Heat tolerance | Very high – can handle open flame and oven | Moderate – avoid very high heat (coating can degrade) |
| Searing | Excellent – retains heat to brown and crisp crust | Fair – heats quickly but doesn’t hold extreme heat |
| Versatility | Can go stovetop→oven or on grill, very durable | Great for stove use and easy cleanup; coating may wear over time |
| Maintenance | Requires seasoning and careful cleaning | Generally low-maintenance, but coating is delicate |
Using the right pan can make a difference. For a heavy, crispy crust, reach for cast iron; for light cooking and easy cleanup, nonstick works well (just mind the heat).
Sous Vide Precision Cooking
Sous vide (French for “under vacuum”) is a high-tech method that yields perfectly juicy chicken every time. You seal the chicken (often with seasoning or marinade) in a plastic bag and immerse it in a precisely temperature-controlled water bath. Because you set the water to the exact temperature you want the chicken to reach, the meat is cooked edge-to-edge to that doneness – no risk of overcooking the exterior while waiting for the center. For example, cooking at 63°C for an hour means the chicken inside will be uniformly 63°C.
The result: chicken that is tender enough to cut with a butter knife, glistening with flavorful juices. It allows you to safely cook at slightly lower temperatures than traditional 74°C, since the long cook time pasteurizes the meat.
To cook sous vide chicken breast: season and bag the chicken, then set the immersion circulator to ~63–65°C. Cook for about 1–2 hours (shorter for thin breasts, longer for thick ones). When done, finish with a quick sear in a hot pan or serve right away. The precision of sous vide ensures there is little to no gradient in doneness – every bite is uniformly tender. For home cooks who want foolproof results, a sous vide setup will transform even a humble chicken breast into something special.
Healthy Approaches to Juicy Chicken Breasts
Low-Fat Cooking Methods
Chicken breast is already a lean protein, so it’s great for healthy cooking. To keep it moist without adding fat, focus on moist-heat methods and steaming. Poaching is ideal for low-fat since it uses only water or broth. Steaming on the stovetop or in a steamer basket is similar, gently cooking the chicken without any oil. If you do pan-cook, use just a little oil (or a nonstick spray) – you don’t need to drown it in butter. Grilling, baking, and air-frying are naturally low-fat too: they allow fat to drip away or use minimal oil to crisp the exterior. In short: use moisture (steam, broth, citrus juice) instead of fat for juiciness whenever possible.
Reducing Sodium While Maintaining Moisture
Salt helps flavor and tenderize, but if you need to cut sodium, you can compensate with other seasonings and techniques. Use salty ingredients sparingly (like low-sodium soy sauce or reduced-sodium broth for brines). Amp up herbs, citrus, garlic and spices. A squeeze of lemon or lime over hot chicken adds bright flavor without salt. For instance, poached or steamed chicken that might get salt from the cooking liquid can instead be seasoned with fresh herbs or a salt-free seasoning blend after cooking.
If you marinate, use herbs and a small amount of acid (vinegar or citrus) to infuse taste instead of relying solely on salt. Also, using a sauce (like a homemade salsa, vinaigrette or tahini lemon sauce) can add flavor so you don’t need as much seasoning on the chicken itself. In practice, cooking methods that preserve the chicken’s natural taste (like steaming or sous vide) let you taste the meat, meaning you can dial back on salt and rely on aromatics to do the flavor work.
Pairing with Nutritious Sides
To keep the meal balanced, serve your juicy chicken with plenty of veggies and whole grains. Fill half your plate with vegetables: think steamed broccolini with lemon, a colorful salad (greens, tomatoes, cucumbers with olive oil & lemon dressing), or oven-roasted cauliflower. Whole grains like brown rice, quinoa tabbouleh, or farro add fiber and complex carbs. Legumes (lentils, chickpeas) also make hearty sides (a lentil salad or bean stew). A light soup (like minestrone or chicken noodle with lots of veggies) alongside chicken can add warmth and nutrition. The key is sides that complement the lean chicken.
Expert Tips and Tricks
Resting Chicken Before Slicing
This tip applies to all cooking methods: let your chicken rest after it’s off the heat. Resting means transferring the cooked chicken to a plate and tenting it loosely with foil for about 5–10 minutes. Why? As the chicken cooks, its juices are driven toward the center. Resting gives time for those juices to redistribute evenly throughout the meat. Cut it too soon, and all that moisture runs out onto the plate.
In practice, you might see the internal temp still rise a couple of degrees during rest, meaning it safely hits target without extra cooking. The bottom line: resist the urge to dive in immediately. Resting makes even pan-seared or grilled chicken noticeably juicier on the plate.
Cutting Against the Grain
Always slice chicken against the grain. What does this mean? Look at the cooked breast – you’ll notice faint lines of muscle fibers running in one direction. Instead of cutting parallel to those lines, turn the chicken 90° so your knife cuts across them. This yields very short pieces of muscle fiber, which are much easier to chew. Cutting this way maximizes tenderness. In contrast, slicing with the grain leaves you with long, chewy strands of fiber. Even a sandwich or salad is tastier if the chicken is cut right. So after resting, always double-check the grain direction and slice across it for silkier bites.
Storing and Reheating Without Drying
Leftover chicken can stay juicy if you handle it gently. For storage, cool it completely and refrigerate in an airtight container. Reheating is where moisture is often lost, so do it carefully. The trick is to add a bit of moisture and not use high heat. For example, the oven method: place chicken in a dish, sprinkle a few tablespoons of water or broth around it, cover loosely with foil, and bake at a low temperature (about 160°C/325°F) for 10–15 minutes until warmed through.
The steam from the added liquid and the foil cover keep the meat from drying out. You can also microwave chicken in a covered dish with a splash of water or a damp paper towel to create steam. If using an air fryer, brush the chicken with a tiny bit of oil and heat at 170°C (340°F) for a couple of minutes per side – it comes out crisp outside and moist inside. Always heat just until it’s hot, and avoid repeated reheating. With these gentle methods, even leftovers will remain tender and juicy.
Now that you’re armed with these 15 methods — from proper prep and precise cooking to flavor techniques and gadgets — you can transform humble chicken breasts into a juicy, tender centerpiece.
Give these techniques a try, and you’ll be a master of moist chicken in no time. Ready to put them into practice? Start with the best ingredients: treat yourself to premium free-range chicken breasts from A Place 2 Meat. Our hormone-free, locally-sourced chicken sets you up for success on the stove or grill. Happy cooking!