
About Us
Our meat is always fresh, hand-cut, delicious and prepared with care. We pride ourselves on the quality of meat we sell to our customers because we value you!
Contact Info
- 110/400 Newmarket Road, Newmarket QLD 4051
- +0738564216
- 110/400 Newmarket Road, Newmarket QLD 4051
- +0738564216
How to Tenderize Beef — All Methods
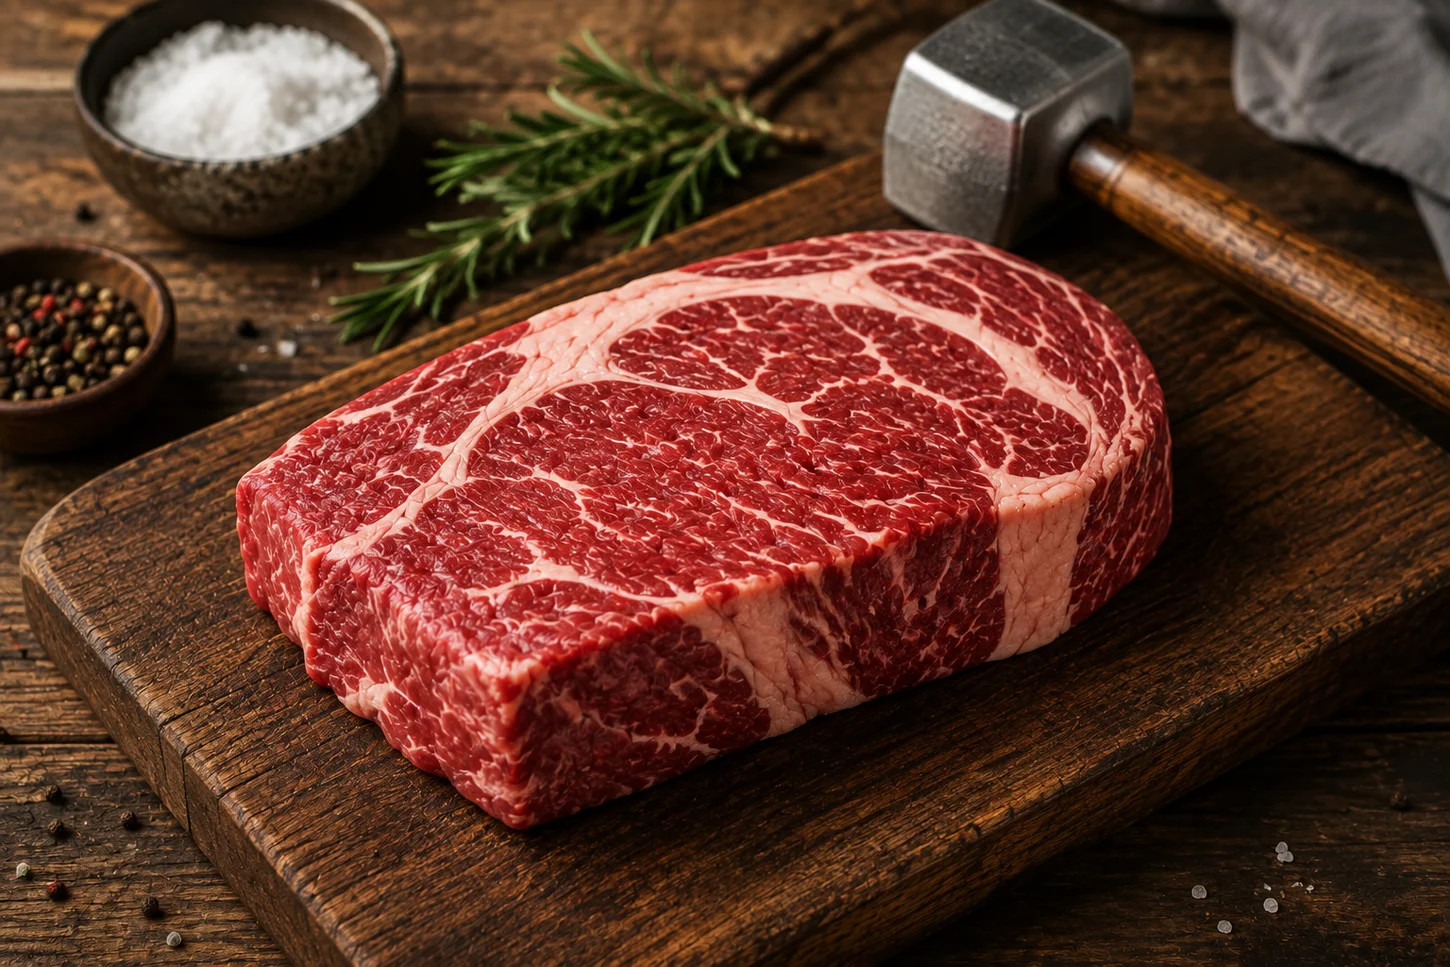
Not all beef is created equal. Pull a rib eye from the fridge, cook it right, and it practically melts. Try the same approach on a brisket or a chuck steak, and you’ll end up chewing longer than you’d like. That difference isn’t luck — it’s science, and understanding it is the key to getting the most out of every cut you buy.
Beef tenderness comes down to a handful of factors working together: muscle fibres, connective tissue, collagen, fat and marbling, cooking temperature, and cooking time. Some cuts have short, loosely arranged muscle fibres with generous marbling and very little connective tissue, which means they’re tender right out of the gate. Others are dense, loaded with collagen and elastin, and need a completely different approach before they’ll be worth eating.
It’s worth making one important distinction before we get into the methods. There are actually four separate things people mean when they talk about tenderising beef:
- Tenderising raw beef before it’s cooked — using salt, enzymes, mechanical force, or marinades to alter the structure of the meat.
- Breaking down connective tissue through cooking — using long, slow heat to convert collagen into gelatin, which is a fundamentally different process.
- Preventing beef from becoming tough — proper cooking technique to avoid overcooking naturally tender cuts.
- Making beef easier to chew through slicing — cutting against the grain to shorten muscle fibres mechanically.
There is no single best way to tenderize beef. The right method depends on the cut, what you’re cooking, and the result you’re after. This article covers every approach worth knowing — from dry brining and mechanical tenderising to velveting, enzymatic marinades, ageing, and the cooking methods that transform the toughest cuts into something genuinely delicious.
What Makes Beef Tough?
Muscle Fibres and Connective Tissue
The toughness of a beef cut is largely determined by how hard the muscle worked during the animal’s life. Heavily used muscles — shoulders, legs, hindquarters — develop dense, tightly packed muscle fibres surrounded by thick layers of connective tissue.
That connective tissue is made up of two proteins: collagen and elastin. Collagen, when exposed to long, slow moist heat, converts into gelatin — which is what gives a well-braised brisket or chuck steak that silky, rich texture. Elastin, on the other hand, doesn’t break down in the same way, which is why cuts with high elastin content benefit from mechanical tenderising or careful trimming.
Different cuts respond differently to tenderising because of these structural differences. A thick rump steak has long, dense muscle fibres that respond well to slicing against the grain or a salt brine. A brisket has so much connective tissue that the only real path to tenderness is time and low heat.
Why Some Beef Cuts Are Naturally Tender
The cuts that come from less-worked muscles — the back, the rib section, and parts of the loin — are naturally more tender. These muscles don’t carry the animal’s weight or power its movement, so they develop shorter, finer fibres with less connective tissue.
Marbling plays a major role here too. Intramuscular fat melts during cooking and bastes the meat from the inside, contributing to both perceived tenderness and flavour. Cuts with generous marbling forgive slight overcooking in a way that lean cuts simply don’t.
The prime examples of naturally tender beef:
- Rib eye — generous marbling, fine muscle structure, very little connective tissue
- Scotch fillet — essentially the boneless version of the rib eye, same characteristics
- Sirloin — tender with moderate marbling, slightly firmer than rib eye
- T-bone — combines sirloin and eye fillet in the one steak
We stock all of these at A Place 2 Meat — Rib Eye on the Bone, Scotch Fillet, Sirloin Steak, and T-Bone Steaks. None of them need aggressive tenderising — what they need is the right cooking technique and, where appropriate, a dry brine.
If you want to see what marbling actually does to tenderness, our Wagyu Rump MB 6–7 is a good place to start. The intramuscular fat in Wagyu beef gives it a natural tenderness and richness that tenderising techniques are really trying to replicate — starting with a cut this well-marbled removes a significant amount of the work.
Why Tougher Cuts Need Different Treatment
On the opposite end of the spectrum are the cuts that come from heavily exercised muscles. These aren’t bad cuts — they’re actually some of the most flavourful in the animal — but they need a specific approach.
- Brisket — from the chest, one of the hardest-working muscles on the animal, very high in collagen
- Chuck steak — from the shoulder, deeply flavoured, needs slow cooking or marinating
- Rump — from the hindquarter, can be tender if treated right but benefits from brining, marinades, or correct slicing
The reason these cuts often benefit more from long, slow cooking is straightforward: they contain enough collagen that, given time and low heat, they convert to gelatin and produce a rich, tender result. A quick sear destroys that potential.
That’s exactly why we always recommend low-and-slow cooking for our beef brisket — it’s the only method that does justice to a cut this rich in connective tissue. The same logic applies to chuck steak: give it time and low heat, and the flavour that comes out of that shoulder muscle is genuinely hard to beat.
The Main Ways to Tenderize Beef
Before getting into each method, it helps to understand the four broad categories:
| Category | How It Works |
| Mechanical tenderising | Physically disrupts muscle fibres and connective tissue |
| Salt and brining | Alters protein structure, improves moisture retention |
| Chemical and enzymatic tenderising | Breaks down proteins using acids or natural enzymes |
| Cooking techniques | Uses heat, time, and moisture to transform tough cuts |
Each of these categories covers multiple specific methods, and the best approach will always depend on which cut you’re working with and what you’re trying to make.
Method 1 — Dry Brining Beef With Salt
How Salt Tenderizes Beef
Dry brining is one of the most effective and underused methods for improving steak texture. When you apply salt to the surface of beef and give it time, the salt initially draws moisture out of the meat through osmosis. That moisture dissolves the salt on the surface, and the now-salty liquid is then drawn back into the meat, where it alters the muscle proteins.
This process — called denaturation — causes the proteins to partially unravel and restructure. The muscle fibres lose some of their ability to contract tightly during cooking, which means less moisture is squeezed out and the result is a more tender, juicier piece of beef.
The longer the salt has to work, the more pronounced this effect. A quick pre-salt does something, but it doesn’t have enough time to really alter the structure of the meat.
How to Dry Brine Beef
- Salt evenly. Use kosher salt or flaked sea salt — about ¾ to 1 teaspoon per 500g of beef. Apply it evenly across all surfaces, including the edges.
- Refrigerate uncovered. Place the beef on a wire rack over a tray and refrigerate without covering it. This also allows the surface to dry out, which helps with browning.
- Allow sufficient time. At minimum, 45 minutes. For best results, 24 hours. Thick cuts like a whole rump or rib eye on the bone can go up to 48 hours.
- Pat dry before cooking. Before placing the beef over high heat, pat the surface dry with paper towels to encourage better crust formation.
Which Beef Cuts Benefit Most From Dry Brining?
Dry brining works best on cuts that will be cooked with high, direct heat. The method has the biggest impact on:
- Sirloin — already tender, dry brining takes it further
- Rump — genuinely improves the texture of a cut that can be hit-or-miss
- T-bone — benefits from the extra time for salt to penetrate both sides of the bone
- Scotch fillet — doesn’t need it as much, but the results are excellent
- Rib eye on the bone — especially useful when the cut is very thick
Dry Brining vs Salting Immediately Before Cooking
There’s a common debate about whether to salt immediately before cooking (which can also produce good results) or in the 15–40 minute window (which is often considered the worst time to salt). When salt sits on the surface for 15–40 minutes, it draws moisture out but that moisture hasn’t had time to be reabsorbed, so you’re cooking a wet exterior that won’t brown properly. Salt either immediately before cooking, or at least 45 minutes — ideally several hours — ahead.
Method 2 — Pounding Beef With a Meat Mallet
How Mechanical Tenderising Works
A meat mallet is the most direct form of tenderising. When you physically pound beef, you’re breaking up the muscle fibres and disrupting the connective tissue in a way that no marinade or salt brine can replicate. The result is a more uniform thickness, shorter broken fibres, and beef that cooks more evenly and is easier to chew.
This is a particularly useful method for naturally tougher thin cuts that you still want to cook quickly — rather than committing to a long braise, you’re making them tender mechanically.
How to Pound Beef Without Ruining It
- Cover the meat. Always place the beef between two sheets of cling film or baking paper before pounding. This prevents the mallet from tearing the surface and keeps things clean.
- Use controlled force. You want to flatten and disrupt the fibres, not pulverise the meat into something unrecognisable. Work with the flat side of the mallet for even thinning, and the textured side for targeted tenderising.
- Aim for even thickness. This matters as much for tenderness as for cooking — uneven steaks cook unevenly, with thin areas overcooking before the thick sections are done.
Which Cuts Are Suitable for Pounding?
- Rump — works well for schnitzel and thin steaks
- Round — tough, lean, responds well to mechanical tenderising
- Thin steaks — any cut that needs to be flattened for fast, high-heat cooking
- Tougher thin-cut beef — cuts that would be difficult to eat unaltered
Our Beef Schnitzel is a ready example of this — tenderised beef cutlets prepared exactly this way. Schnitzel is the classic application for meat mallet tenderising: flat, even thickness, quick and crisp in the pan.
Method 3 — Blade Tenderizing Beef
What Is a Jaccard or Blade Tenderizer?
A Jaccard tenderizer (sometimes called a needle tenderizer or blade tenderizer) is a tool fitted with multiple small, sharp blades or needles. When pressed into the surface of beef, these blades penetrate the meat, physically cutting through muscle fibres and connective tissue without altering the cut’s shape.
It’s a faster, more targeted version of mechanical tenderising — useful when you want to improve a tougher cut without the flattening effect of a mallet.
How Blade Tenderizing Works
The blades create hundreds of small cuts through the surface and interior of the beef. This shortens the muscle fibres across the cut, making each bite shorter and easier to chew. It also opens up channels that allow marinades and salt brines to penetrate more quickly and deeply.
Which Beef Cuts Can Benefit?
- Rump — one of the most common applications
- Sirloin — helps when working with a particularly dense or lean piece
- Other relatively lean steaks — any cut where you want to improve texture without the commitment of slow cooking
Food Safety Considerations
Blade tenderising does come with one important safety note. When blades push through the surface of raw beef, they can carry surface bacteria — which typically only contaminates the exterior of an intact cut — into the interior. In an unbroken steak, you can cook it to medium-rare at the surface and it’s fine. In a blade-tenderised steak, that’s no longer accurate, as the interior may now contain surface bacteria.
For blade-tenderised beef, cooking to a higher internal temperature — or ensuring the whole cut reaches safe temperatures — is the recommended approach. In Australia, commercially blade-tenderised beef is labelled accordingly.
Method 4 — Score the Surface of Beef
How Scoring Helps
Scoring means making shallow cuts across the surface of beef in a cross-hatch pattern before cooking. It’s not the same as blade tenderising — the cuts are deliberate, visible, and usually made with a knife.
The main benefit is surface area. More surface area means more contact with heat during cooking, more caramelisation, and more penetration from marinades and seasonings. Scoring also allows the surface of the meat to open up slightly during cooking, which can help prevent the beef from curling.
How Deep Should You Score Beef?
Scoring cuts should generally be no more than 5–7mm deep. The goal is to open up the surface, not to cut through the meat or compromise its structure. Cuts that are too deep can cause the beef to fall apart during cooking or cook unevenly.
Score in one direction, then at an angle across those cuts to create a diamond pattern. This is especially effective on thicker cuts where you want marinade to reach deeper into the meat.
Best Cuts and Dishes for Scoring
- Flank — almost always benefits from scoring before grilling
- Rump — works particularly well with scoring and marinating
- Thin steaks — scoring before a quick grill or char gives great results
- BBQ beef — scoring helps in all marinades and allows caramelisation
- Stir-fry beef — surface scoring before slicing can help thicker pieces
- Marinated beef — any cut where you want the marinade to work deeper
Method 5 — Cut Beef Against the Grain
What Is the Grain in Beef?
The grain refers to the direction that the muscle fibres run through a piece of beef. If you look closely at a rump steak, flank steak, or brisket, you can see long parallel lines running in a consistent direction across the meat. Those lines are the grain.
How Cutting Against the Grain Improves Tenderness
When you cut with the grain, each slice contains long, unbroken muscle fibres that you have to chew through entirely. When you cut against the grain — perpendicular to those fibres — each slice contains much shorter fibre segments that require far less effort to chew.
This is essentially mechanical tenderising applied at the serving stage. No soaking, no mallet, no enzyme — just smart knife work that makes a significant difference in how the beef feels in your mouth.
How to Find the Grain
Look for the long lines running across the surface of the meat. On a rump or flank steak they’re usually easy to spot. On more marbled cuts they can be harder to see — try holding the meat up to the light. Once you’ve identified the direction, turn your knife 90 degrees to it before slicing.
Which Beef Cuts Should Be Sliced Against the Grain?
- Flank steak — essential; this cut is almost inedible when sliced with the grain
- Skirt steak — same as flank, very obvious grain
- Rump — cutting against the grain makes a noticeable difference
- Sirloin — apply this especially when serving as thin slices
- Brisket after cooking — always slice against the grain for sliceable brisket
Why This Matters for Stir-Fry and BBQ
For stir-fry, slicing against the grain is non-negotiable if you want the beef to be tender. The strips need to be thin and cross-grain to cook quickly and chew easily. For BBQ, especially with cuts like flank or skirt, the difference between slicing with and against the grain is the difference between a good result and a frustrating one.
Method 6 — Baking Soda
Why Baking Soda Tenderizes Beef
Baking soda (sodium bicarbonate) is an alkali that raises the pH on the surface of beef. When the surface becomes more alkaline, the muscle proteins are less able to bond tightly together during cooking. The result is beef that retains more moisture and has a noticeably more tender, slightly slippery texture when cooked.
This is a widely used technique in Chinese cooking, and it’s particularly effective for thin-sliced beef that will be cooked very quickly at high heat.
How to Use Baking Soda on Beef
- Use a small amount. Roughly ¼ teaspoon per 250g of beef is enough. More is not better.
- Short treatment. 15–30 minutes is sufficient for thin slices. Longer exposure doesn’t improve results and can ruin the texture.
- Rinse where appropriate. For some applications — particularly where the flavour of the dish is delicate — rinse the beef after treatment. For stir-fries, many cooks simply proceed without rinsing.
- Dry thoroughly before cooking. Pat the beef dry before it hits the wok or pan to ensure proper searing rather than steaming.
Which Beef Cuts Benefit Most?
- Thinly sliced beef — the most effective application
- Stir-fry beef — particularly effective for high-heat quick-cook situations
- Rump — responds well when sliced thin
- Sirloin — good results when used for Asian-style cooking
- Other lean cuts — any cut that might turn rubbery in a hot wok
What Happens If You Use Too Much?
Too much baking soda produces an unmistakable alkaline flavour — slightly soapy, metallic, unpleasant. The texture also becomes unnaturally slick and mushy on the outside while potentially remaining tough on the inside. Stick to the recommended amount and timing.
Method 7 — Chinese Velveting
What Is Beef Velveting?
Velveting is a Chinese cooking technique that produces the silky, tender beef you find in restaurant-quality stir-fries. It combines several tenderising mechanisms in one process — baking soda, cornstarch, and sometimes egg white — to create beef that stays tender and moist through the high-heat cooking process.
If you’ve ever wondered how Chinese restaurants make beef so tender, velveting is almost always the answer.
How Velveting Makes Beef Tender
The technique works through several mechanisms working together:
- Baking soda raises the surface pH and alters protein behaviour
- Cornstarch forms a protective coating that holds moisture in
- Egg white (in some versions) adds further protection and changes the surface texture
- Together they retain moisture during cooking and prevent the beef from seizing and toughening in the wok
How to Velvet Beef at Home
- Slice against the grain. This is step one — thin slices cut perpendicular to the muscle fibres.
- Marinate. Combine with baking soda, cornstarch, soy sauce, and optionally egg white. Let it sit for 20–30 minutes.
- Briefly blanch or stir-fry at high heat. Either briefly pass the beef through hot oil or boiling water for 30–60 seconds until just cooked through.
- Finish in the dish. Add to your stir-fry or sauce for the final stage of cooking.
Which Beef Cuts Work Best?
- Sirloin — excellent results for stir-fry
- Rump — the most budget-friendly option that still velvets well
- Flank — classic for beef and broccoli, mongolian beef
- Other thinly sliced beef — virtually any lean cut benefits
Why Velveting Is Better for Sliced Beef Than a Whole Steak
The baking soda in velveting works on the surface and slightly into the interior of sliced beef. On a whole steak, the ratio of surface area to mass means the baking soda only affects a shallow exterior layer. For thin slices, the ratio is reversed — the treatment works through a much greater proportion of the meat. This is why velveting is ideal for stir-fries and not for grilled steaks.
Method 8 — Natural Enzymatic Tenderizers
Some fruits contain enzymes that break down the peptide bonds in meat proteins — essentially digesting them slightly before cooking. These are among the most powerful natural tenderising tools available.
Papaya and Papain
Papain is a protease enzyme found in papaya, particularly in unripe green papaya. It’s highly effective at breaking down muscle proteins and is one of the main active ingredients in commercial meat tenderizing powders.
- Green papaya vs ripe papaya: Green papaya contains significantly more papain than ripe fruit. Ripe papaya still works but more slowly.
- How to use it: Make a paste from green papaya flesh and rub it across the surface of the beef. Alternatively, use the juice or a commercial papain-based powder.
- Timing matters: 15–30 minutes is usually enough for thin cuts. Thick cuts can go longer, but watch the texture carefully — once papain starts working it continues until heat deactivates it.
Pineapple and Bromelain
Bromelain, found in fresh pineapple, is another powerful protease enzyme. It’s so effective that marinating beef in fresh pineapple juice for more than 30–45 minutes can turn the surface of the meat to mush.
The key is using fresh pineapple — canned pineapple is heat-treated during processing, which deactivates the bromelain and renders it ineffective as a tenderiser.
Use sparingly: bromelain works fast and has a fairly narrow window between “perfectly tenderised” and “overworked.” It works best on thin cuts or shorter marinating times.
Kiwi and Actinidin
Kiwifruit contains actinidin, another effective proteolytic enzyme. It’s generally considered gentler than papain or bromelain, making it a more forgiving option for those new to enzymatic tenderising.
Mash or grate kiwi and combine with other marinade ingredients. Best applications include steaks and thicker cuts where a brief treatment (30–60 minutes) is appropriate. The mild enzyme action and short marinade time mean you’re less likely to end up with an overly soft exterior.
Commercial Meat Tenderizers
Commercial tenderising powders typically contain papain, bromelain, or a blend of both, along with salt and sometimes additional seasonings. They’re convenient and consistent — you know roughly what you’re getting. Follow the package instructions, which generally specify a limited application time. More time is not more better.
Why You Can Over-Tenderize Beef
Enzymatic tenderisers continue working as long as the temperature allows. If you leave beef in an enzymatic marinade for too long, the surface proteins break down to the point of becoming mushy, grainy, or unpleasantly soft. Tenderness and mushiness are not the same thing. The right result is beef that’s noticeably easier to chew; the wrong result is beef that’s lost its structural integrity entirely.
Method 9 — Acidic Marinades
How Acid Affects Beef
Acidic ingredients — vinegar, citrus juice, wine — alter the proteins on the surface of beef by denaturing them. At low levels of exposure, this can improve texture and help the surface retain more moisture during cooking. The effect is surface-level rather than deep-penetrating, and the primary benefit for most cuts is flavour and surface texture rather than through-the-cut tenderisation.
Vinegar Marinades
- Red wine vinegar — works well with red meat, adds complexity
- Apple cider vinegar — slightly sweeter, good for BBQ applications
- Rice vinegar — milder, suits Asian-style beef marinades
Citrus Marinades
Lemon, lime, and orange all bring acidity with their own distinct flavour profiles. Citrus marinades are particularly useful for:
- Grilled beef dishes
- Mexican-style beef like carne asada
- Lighter preparations where you don’t want a heavy sauce
Wine-Based Marinades
Red wine with herbs, garlic, and aromatics is a classic European approach. The tannins and acidity in the wine work on the surface of the beef, while the aromatics flavour it deeply. This suits braised dishes, slow-cooked beef, and marinated steaks that will be grilled or pan-fried.
How Long Should Beef Be Marinated in Acid?
The common mistake is marinating in an acidic mixture for too long. Extended exposure — more than a few hours for thin cuts, more than overnight for thicker ones — can actually toughen the surface rather than soften it, as the acid begins to denature proteins to an extent that changes the texture negatively.
A guideline:
| Cut Thickness | Maximum Acid Marinade Time |
| Thin slices (stir-fry) | 30 minutes |
| Thin steaks | 2–4 hours |
| Rump, sirloin | 4–8 hours |
| Thick cuts | Overnight maximum |
Method 10 — Dairy-Based Marinades
Yoghurt Marinades
Yoghurt is a gentler tenderising marinade than vinegar or citrus. The lactic acid in yoghurt denatures surface proteins more slowly and evenly, producing a softer, more even texture rather than the tougher exterior that over-acidic marinades can produce.
Yoghurt also contributes moisture and clings to the surface of beef, which helps it char beautifully on a grill. Combined with spices — cumin, turmeric, coriander, garam masala — it’s the foundation of many tandoori and Indian-style beef marinades.
Buttermilk
Buttermilk has a milder acidity than yoghurt and a thinner consistency. It works on a similar principle — lactic acid acting gradually on the surface proteins — but has fewer applications in beef preparation than in chicken. It can be useful for thinner beef cuts, particularly those that will be crumbed and fried.
When Should You Use a Dairy Marinade?
- Grilled beef — particularly for cuts that will be cooked over high heat where you want a good char
- Spiced beef — yoghurt carries spices well and distributes them evenly
- Indian-inspired preparations — tikka, kebabs, skewers
- Certain BBQ applications — particularly when you want a rich, caramelised exterior
Method 11 — Soy Sauce and Salt-Rich Marinades
How Salt Helps Improve Beef Texture
We’ve already covered dry brining in detail, but salt also plays a significant role in wet marinades. The principle is the same — salt alters muscle proteins through osmosis — but in a liquid marinade, the process happens alongside other flavour-building ingredients.
Soy Sauce as a Marinade Ingredient
Soy sauce brings several things to a beef marinade simultaneously:
- Salt — the main tenderising mechanism
- Umami — deep, savoury depth that enhances the natural flavour of beef
- Colour — adds a deep brown colour that encourages a rich caramelised exterior
- Moisture retention — helps the beef hold onto liquid during cooking
Soy-Based Marinades for Stir-Fry and BBQ
A classic soy-based marinade for either application combines:
- Soy sauce
- Garlic (minced)
- Ginger (fresh, grated)
- Sesame oil
- Sugar or honey (for caramelisation)
This combination works well for thinly sliced stir-fry beef, Korean-style BBQ, and marinated steaks that will hit a hot grill.
Does Soy Sauce Deeply Tenderize Beef?
It’s worth being clear about what soy sauce can and can’t do. The salt in soy sauce affects the outer layers of the beef meaningfully, but it doesn’t penetrate deeply into a thick steak the way that dry brining over 24 hours does. The primary contribution of soy sauce in a marinade is flavour, moisture, and surface texture — not deep structural tenderisation.
Method 12 — Ageing Beef
Ageing is one of the least accessible but most effective tenderising methods. It works through natural enzymatic activity — the same enzymes responsible for digestion and metabolism slowly break down the protein structures in the beef over days or weeks.
Wet Ageing
Wet ageing involves sealing beef in a vacuum pack and refrigerating it for an extended period. Without air exposure, the natural enzymatic processes continue, gradually breaking down the muscle fibres from the inside. Most commercially available beef in Australia has been wet-aged to some degree before reaching the retailer — the timeframe varies.
The result is beef that’s noticeably more tender than fresh-cut beef, without the flavour concentration that comes from dry ageing.
Dry Ageing
Dry ageing is what you find at premium steakhouses and specialty butchers. Beef — typically large primal cuts — is stored in a controlled environment with specific temperature, humidity, and airflow for anywhere from 21 to 90+ days.
Several things happen during dry ageing:
- Moisture evaporates, which concentrates the beef’s flavour significantly
- Natural enzymes break down proteins, producing exceptional tenderness
- A dry crust forms on the surface (called the pellicle), which is trimmed off before sale — this accounts for some of the premium price
The flavour of dry-aged beef is nutty, concentrated, and distinctly different from fresh beef. It’s not subtle.
Which Beef Cuts Are Suitable for Ageing?
- Rib cuts — the premium choice for dry ageing
- Sirloin — responds well to both wet and dry ageing
- Rump — benefits from ageing, particularly wet ageing
- Larger primal cuts — ageing requires sufficient mass; thin cuts don’t age well
Can You Dry Age Beef at Home?
Home dry ageing is possible but carries meaningful food safety risks if done incorrectly. You need a dedicated mini-fridge with consistent temperature (1–3°C), a small fan for airflow, and ideally a purpose-built ageing bag or controlled humidity environment. Without these conditions, you’re more likely to produce spoiled beef than properly aged beef. For most home cooks, sourcing quality aged beef from a trusted butcher is a safer and more reliable approach.
Cooking Methods That Make Beef Tender
This is where the distinction between tenderising raw beef and making tough beef tender through cooking becomes critical. Some cuts cannot be made tender through any pre-cooking method — they need heat, time, and often moisture.
Low-and-Slow Cooking
Low-and-slow is the cooking principle behind some of the best beef dishes in the world. At low temperatures over a long period, the collagen in connective tissue gradually denatures and converts to gelatin. Rather than producing a tough, chewy texture, this gelatin makes the beef silky, rich, and spoonable. This is the process that makes properly cooked brisket, chuck, and oxtail so satisfying.
The key is patience — rushing the process with higher heat produces a different result entirely. High heat contracts the muscle fibres too quickly, squeezing moisture out before the collagen has had time to convert.
Braising
Braising combines low heat, moisture, and time. Beef is partially submerged in liquid — stock, wine, crushed tomatoes, beer — and cooked in a covered pot at a low temperature. The liquid both conducts heat evenly and keeps the environment moist, which is ideal for collagen-rich cuts.
Our chuck steak braised with red wine and aromatics is a textbook application — deeply flavoured, rich, and nothing like what you’d get from a quick cook. Brisket braised in beef stock with onions and bay leaves is the same story.
Slow Cooking
A slow cooker is the accessible home version of braising. Set it up in the morning, leave it all day, and come home to beef that has become tender through sheer time at low temperature. Tough cuts — chuck, brisket, rump — are the right choice here. Naturally tender cuts will overcook and become dry.
Smoking and BBQ
Low-temperature smoking is the defining method for American-style BBQ beef, particularly brisket. Temperatures typically sit around 110–135°C (225–275°F) for periods of 8–16 hours or more. The collagen breaks down slowly, the fat renders, and the smoke penetrates the surface of the meat. The result is brisket with a smoke ring, a bark on the exterior, and an interior that’s tender enough to pull apart.
Our beef brisket is built for this. Smoking, braising, slow cooking — any of these works, as long as the heat stays low and the time stays long. There’s no shortcut for brisket, and anyone who tells you otherwise hasn’t cooked one properly.
Sous Vide
Sous vide cooking involves vacuum-sealing beef and cooking it in a precisely temperature-controlled water bath for an extended period. The result is beef cooked to an exact internal temperature throughout — not just in the centre — which produces consistency that’s impossible to achieve any other way.
For tender steaks like rib eye or sirloin, sous vide at 54°C (for medium-rare) for 1–4 hours followed by a quick high-heat sear produces excellent results. For tougher cuts, sous vide at higher temperatures for much longer periods (24–48 hours for short ribs, for example) can produce a tender result without the moisture loss of conventional braising.
Cooking Beef Correctly to Prevent Toughness
Tenderising and cooking technique aren’t separate considerations. Even the most carefully prepared beef can be made tough by incorrect cooking.
Don’t Overcook Naturally Tender Cuts
The fastest way to ruin a rib eye, Scotch fillet, sirloin, or T-bone is to overcook it. These cuts have little connective tissue and rely on their fat and muscle structure for texture. Once overcooked, the muscle fibres contract, moisture is expelled, and no amount of resting will bring them back. Medium-rare to medium is the target for most premium steaks.
Match Cooking Time to the Cut
This is the fundamental rule:
- Quick, high heat for naturally tender steaks — rib eye, Scotch fillet, sirloin, T-bone
- Long, low heat for collagen-rich cuts — chuck, brisket, short ribs, oxtail
Applying the wrong approach to either type of cut produces a disappointing result.
Use a Meat Thermometer
Timing alone is an unreliable guide for beef. The thickness of the cut, the starting temperature of the meat, the exact heat of your pan or grill, and the ambient conditions all affect how quickly beef cooks through. A meat thermometer removes the guesswork:
| Doneness | Internal Temperature |
| Rare | 50–52°C |
| Medium-rare | 54–57°C |
| Medium | 60–63°C |
| Medium-well | 65–68°C |
| Well done | 70°C+ |
Rest the Beef Before Cutting
Resting is non-negotiable for any beef that’s cooked using high heat. During cooking, the muscle fibres contract and push moisture toward the centre of the cut. Resting — ideally for half the cooking time, loosely covered with foil — allows those fibres to relax and the moisture to redistribute. Cut into beef immediately after cooking and you’ll lose significantly more juice than if you had waited.
The common concern about carryover cooking during resting is valid — the internal temperature continues to rise for a few minutes after the beef is removed from heat, particularly for thick cuts. Factor this into your target temperature.
How Different Cuisines Tenderize Beef
Different culinary traditions around the world have developed their own approaches to getting the most out of beef. Some of the most effective and interesting tenderising techniques come from these regional methods.
Korean Beef — Bulgogi
Bulgogi (“fire meat”) is one of the most refined examples of beef preparation in any cuisine. The marinade typically combines soy sauce, pear or Asian pear (which contains an enzyme that tenderises beef), onion, garlic, ginger, sesame oil, and sugar. The beef is sliced very thin, against the grain, marinated for a few hours, and then cooked quickly over high heat.
The combination of enzymatic activity from the pear, salt from the soy sauce, and thin slicing against the grain produces beef that is extraordinarily tender for something cooked so quickly.
Chinese Beef — Velveting
As covered in Method 7, velveting is the defining technique of Chinese restaurant stir-fried beef. Baking soda, cornstarch, and sometimes egg white create a protective coating that keeps the beef silky and tender through high-heat cooking. The result is beef with a texture that’s difficult to replicate without understanding the technique.
Filipino Beef — Bistek
Bistek Tagalog is a Filipino dish that uses thin-sliced beef (often sirloin or rump) marinated in calamansi juice — a local citrus — and soy sauce, then cooked with onion rings. The combination of citrus acid and the salt in the soy sauce improves both the texture and the flavour of the beef. It’s a simple marinade that demonstrates how effective even a short acid-and-salt treatment can be when combined with the right slicing approach.
Mexican Beef — Carne Asada
Carne asada relies on a marinade that typically includes lime juice, orange juice, garlic, chilli, and herbs (usually coriander). The citrus does some mild surface tenderising, but the bigger contribution is flavour. The beef — usually flank or skirt steak — is marinated for a few hours, cooked over extremely high heat, and served sliced against the grain. The slicing technique does as much work as the marinade.
Indian-Style Beef Marinades
The yoghurt-based marinades common in North Indian cooking — tikka masala, biryani, beef kebabs — use lactic acid and the physical coating properties of yoghurt to both tenderise and flavour beef. Ginger and garlic in the marinade also contribute enzymatic activity. The result after high-heat cooking (tandoor oven or charcoal grill) is beef that’s charred on the outside and moist and tender within.
Texas-Style Brisket
Texas BBQ brisket might be the most technically demanding item on this list. The preparation is paradoxically simple — a dry rub of salt and black pepper, applied to the whole brisket — but the cooking process is long and precise. Low temperatures (around 110°C), hardwood smoke, and 12–16 hours or more of patient cooking allow the collagen to fully convert. The result — a smoke ring under a black pepper bark, yielding slices of brisket that hold their shape but melt in the mouth — is one of the great achievements of beef cookery.
If you’re in Brisbane and want to try Texas-style brisket at home, our beef brisket is the right cut to start with. Smoke it low and slow — that’s all you need.
Which Beef Tenderizing Method Should You Use?
This is the practical question, and the answer always starts with the cut.
| Beef Cut / Situation | Best Approach |
| Rib eye | Cook correctly; dry brine is optional but improves results |
| Scotch fillet | Dry brine + proper cooking temperature |
| Sirloin | Dry brine + correct cooking |
| T-bone | Dry brine + high-heat cooking |
| Rump steak | Dry brine, marinade, or mechanical tenderising |
| Tough rump | Mechanical tenderising or enzymatic marinade |
| Chuck steak | Braising or slow cooking |
| Brisket | Smoking, braising, or slow cooking |
| Thin beef strips | Baking soda or velveting |
| Stir-fry beef | Velveting + slicing against grain |
| BBQ beef | Marinade + correct cooking + slice against grain |
| Very tough beef | Mechanical tenderising or long, slow cooking |
You’ll find every cut in this table in our beef range — brisket, chuck, rump, sirloin, Scotch fillet, rib eye, T-bone, and the Wagyu Rump MB 6–7. That last one deserves a mention: at MB 6–7, the marbling is high enough that the beef is naturally approaching the tenderness of a premium rib eye — one of those situations where choosing the right cut does more work than any tenderising technique.
What Doesn’t Actually Tenderize Beef?
There’s a lot of misinformation circulating about what tenderises beef. This is worth addressing directly.
Olive oil: Doesn’t tenderise. It can help prevent sticking and contributes to a crust, but it has no effect on muscle fibres or connective tissue.
Garlic: Doesn’t tenderise. It flavours beef and contributes aromatics, but contains no enzyme or compound that affects beef texture.
Black pepper: Doesn’t tenderise. It adds flavour and contributes a crust, but has no effect on beef structure.
Worcestershire sauce: Contains vinegar, which can have a very mild surface effect, but the concentration is too low for meaningful tenderisation. Its main contribution is flavour and colour.
Butter: Doesn’t tenderise. It adds richness and flavour when basted over beef during cooking, but has no structural effect.
Bringing beef to room temperature before cooking: Doesn’t tenderise beef in any structural sense. The rationale is that it allows more even cooking — but research shows that even an hour out of the fridge barely changes the internal temperature of a thick steak. The main benefit is slightly more even cooking at the centre, not tenderisation.
Resting after cooking: Improves juiciness by allowing moisture to redistribute, but doesn’t tenderise. A tough steak that’s been rested is still a tough steak.
All of these things can contribute positively to flavour, cooking performance, or eating quality. They just shouldn’t be described as tenderising agents, because that’s not what they do.
Common Beef Tenderizing Mistakes
Using Too Much Baking Soda
A common mistake with baking soda is assuming that more produces better results. It doesn’t. Too much baking soda leaves an alkaline, soapy flavour and creates an unnaturally slick, mushy exterior. Stick to approximately ¼ teaspoon per 250g and rinse if the flavour profile of the dish calls for it.
Leaving Beef in an Enzyme Marinade Too Long
Papain, bromelain, and actinidin don’t stop working until heat deactivates them. Leaving beef in an enzyme marinade overnight produces an exterior that’s mealy, soft, and unpleasant rather than tender. 30–60 minutes is usually enough for most applications.
Marinating in Acid Overnight Without Considering the Cut
Overnight acid marinades work on some cuts but actively harm others. Thin cuts marinated for too long in lemon juice or vinegar develop a tough, grainy texture on the surface — the acid has over-denatured the proteins. If you’re marinating overnight, use a lower-acid marinade or switch to a dairy-based option.
Over-Pounding the Beef
Pounding with a mallet produces excellent results when done correctly. Done too aggressively, you end up with beef that’s ragged, torn at the surface, and difficult to cook evenly. Use controlled force and stop when the beef has reached the desired even thickness.
Cutting With the Grain
This is one of the most common serving mistakes. Cutting with the grain rather than against it makes beef significantly chewier — regardless of how well it was cooked. Identify the grain direction before you start slicing, particularly for rump, flank, brisket, and sirloin.
Overcooking Lean Beef
Lean cuts — rump, round, sirloin — have very little fat to insulate them from heat. Once overcooked, the moisture is gone and no technique will bring it back. Cook lean steaks to medium-rare or medium and use a thermometer.
Using a Quick-Cooking Method for a Collagen-Rich Cut
A chuck steak cooked in 10 minutes on a hot pan will be tough and disappointing. Brisket on a high grill will be the same. These cuts need hours, not minutes. Matching the cooking method to the cut is the most important decision you’ll make.
Expecting a Marinade to Tenderize a Thick Cut All the Way Through
Marinades — even acidic or enzyme-based ones — penetrate only a few millimetres into the surface of beef. A 3cm thick rump steak sitting in an acidic marinade overnight will have a softer surface but an essentially unchanged interior. For deep tenderisation of a thick cut, the options are mechanical tenderising, long slow cooking, or ageing.
Food Safety When Tenderizing Beef
Always Marinate Beef in the Refrigerator
Never marinate beef at room temperature. Bacteria multiply rapidly in the temperature range of 5–60°C (the “danger zone”), and a few hours of marinating on the bench can produce dangerous bacterial levels. Always marinate in the refrigerator in a sealed container.
Don’t Reuse Raw Marinade Without Cooking It
Marinade that has been in contact with raw beef is contaminated with raw meat bacteria. If you want to use it as a basting sauce or dipping sauce, bring it to a full rolling boil first and cook it for at least a minute before using.
Take Care With Mechanically Tenderized Beef
As noted in the blade tenderising section, mechanical tenderising can move surface bacteria into the interior of the beef. Cook blade-tenderised or Jaccard-tenderised beef to an appropriate internal temperature. In Australia, commercially needle-tenderised beef must be labelled.
Handle Enzymatic Tenderizers Carefully
Natural enzymatic tenderisers — papaya, pineapple, kiwi — work on proteins. They’ll also work on skin if given extended contact, so handle them with care and wash your hands after use. Commercial tenderising powders should be used strictly according to package directions.
Follow Safe Cooking and Storage Practices
Tenderised or marinated beef that won’t be cooked within a day or two should be frozen. Thaw in the refrigerator, not on the bench, and don’t refreeze raw beef that has already been thawed.
Frequently Asked Questions About Tenderizing Beef
What is the best way to tenderize beef?
There isn’t one best method — it depends on the cut and the cooking application. For steaks, dry brining is one of the most effective and simplest approaches. For stir-fry beef, velveting is the gold standard. For tough, collagen-rich cuts like brisket and chuck, low-and-slow cooking is the only method that produces genuinely tender results.
How do you tenderize tough beef quickly?
The fastest methods for quick tenderisation are mechanical (pounding with a mallet or blade tenderising) or using a baking soda treatment for thin cuts. Cutting against the grain also makes a significant difference immediately. For thick, genuinely tough cuts, there’s no quick method that produces a good result — they need time.
Does salt tenderize beef?
Yes, when applied ahead of time (dry brining). Salt applied to raw beef draws moisture out and back in through osmosis, altering the muscle proteins in a way that improves texture and moisture retention during cooking. Salting immediately before cooking is less effective for tenderising but still useful for browning.
Does baking soda really tenderize beef?
Yes, baking soda is genuinely effective, particularly for thin-sliced beef intended for stir-frying. It raises the surface pH, which alters how the muscle proteins behave during high-heat cooking. Used correctly — small amounts, short exposure time — it produces noticeably more tender results.
How long should beef sit in baking soda?
Generally 15–30 minutes for thin slices. Longer isn’t better — extended exposure can produce an unpleasant alkaline taste and a mushy exterior.
Does vinegar tenderize beef?
Vinegar has a mild surface tenderising effect through acid denaturation, but the effect is limited compared to enzymatic or mechanical methods. Its bigger contribution is flavour. Used for too long, acid from vinegar can actually toughen the exterior of beef.
Does soy sauce tenderize beef?
The salt in soy sauce does have a mild tenderising effect on the surface of beef, but its primary contributions are flavour, umami, colour, and moisture. Soy sauce isn’t a reliable standalone tenderiser for thick cuts.
Does Worcestershire sauce tenderize beef?
Not meaningfully. Worcestershire sauce adds excellent flavour — it’s a complex, umami-rich condiment — but the acidity level is too low to produce meaningful tenderisation.
Does Coke tenderize beef?
Coca-Cola contains phosphoric acid and some residual enzymes that can affect the surface of beef slightly, but it’s not an effective or recommended tenderiser. The sugar content can also cause rapid burning on high heat. Its main use in cooking is as a braising liquid for flavour rather than a tenderiser.
Does pineapple tenderize beef?
Fresh pineapple does, yes — effectively. It contains bromelain, a protease enzyme that breaks down meat proteins. The key is fresh pineapple (canned is heat-treated and no longer contains active bromelain), and limiting exposure to 30–45 minutes to avoid over-tenderising the surface.
Does papaya tenderize meat?
Yes — green papaya in particular contains papain, one of the most effective meat-tenderising enzymes available. It’s the active ingredient in most commercial meat tenderising powders. Short exposure times apply here as well.
Does kiwi tenderize beef?
Yes. Kiwifruit contains actinidin, which is effective but gentler than papain or bromelain. It’s a more forgiving option for those concerned about over-tenderising. 30–60 minutes is generally appropriate.
How do Chinese restaurants make beef so tender?
Velveting — the combination of baking soda, cornstarch, and sometimes egg white, combined with slicing against the grain. This technique is almost universally used in Chinese restaurant kitchens for stir-fried beef and produces the characteristic silky texture that’s difficult to replicate without it.
What is velveting beef?
Velveting is a Chinese cooking technique that involves coating thinly sliced beef in a mixture of baking soda, cornstarch, and sometimes egg white before cooking. The baking soda raises the surface pH to prevent protein tightening during high-heat cooking, while the cornstarch and egg white create a protective coating. The result is silky, tender beef in stir-fries.
How do you tenderize beef for stir-fry?
Slice against the grain first — very thin, consistent strips. Then apply a baking soda treatment or a full velveting marinade and allow 20–30 minutes before cooking. Pass through hot oil or boiling water briefly before adding to the wok for the best results.
How do you tenderize beef for BBQ?
It depends on the cut. For steaks like sirloin, rump, or T-bone, dry brining for 24 hours and cutting against the grain after cooking is the most effective approach. For tougher cuts like flank or skirt, a marinade with some acid (citrus or vinegar) plus scoring the surface improves results. For brisket, BBQ means low-and-slow smoking — not a quick grill.
How do you make cheap beef tender?
Cheap cuts are often tough cuts, and the most reliable approach is matching the method to the cut. Chuck steak and brisket become incredible with long, slow cooking — braising or slow cooker. Rump responds to dry brining, mechanical tenderising, and slicing against the grain. Thin slices of any cheap cut can be made tender with baking soda or velveting.
How do you tenderize steak naturally?
Natural tenderising approaches for steak include dry brining with salt, slicing against the grain after cooking, using fruit-based enzymatic marinades (kiwi, pear, papaya), and simply buying cuts with more marbling. Starting with quality beef from a trusted butcher removes a significant amount of the work.
Does cutting beef against the grain make it more tender?
Yes — significantly and reliably. Cutting against the grain shortens the muscle fibres in each slice, making them much easier to chew. This works on virtually every cut and requires no special equipment or ingredients. It’s one of the most consistently effective and overlooked tenderising techniques available.
Can you tenderize beef overnight?
Yes, but the method matters. Salt brining overnight is very effective. Acidic marinades overnight can work for thick cuts but risk over-tenderising thin ones. Enzymatic marinades overnight will almost certainly produce an over-tenderised, mushy result — they should be limited to 30–60 minutes.
What is the best way to tenderize brisket?
Brisket is a collagen-rich cut that cannot be tenderised meaningfully by marinades, salt, or mechanical methods alone. The only reliable path to tender brisket is low-and-slow cooking — either braising in liquid in a covered pot or smoking at low temperature for many hours. Scoring, brining, and dry rubs can all contribute to the final result, but the cooking method is what does the real work.
What is the best way to tenderize chuck steak?
Chuck steak responds best to braising and slow cooking. A long braise in beef stock, wine, or tomatoes at low heat — either in a Dutch oven or a slow cooker — converts the collagen in chuck into gelatin, producing the rich, tender, deeply flavoured result this cut is capable of. If you want to cook it quicker, marinating in an acidic or yoghurt-based marinade and slicing against the grain helps, but it won’t match the result of slow cooking.
Does marinating beef make it tender?
It depends on what’s in the marinade and how long the beef is marinated. Enzymatic marinades (papaya, pineapple, kiwi) genuinely tenderise beef. Salt-rich and acid marinades have a surface effect. Flavour-based marinades — garlic, herbs, oil — don’t tenderise at all but contribute to eating quality in other ways. No marinade deeply penetrates a thick cut in a meaningful way — tenderisation is largely a surface effect.
Start With Great Beef — Everything Else Follows
Understanding how to tenderize beef matters most when you’re starting with the right cut for the job. The best tenderising technique in the world won’t transform a cheap, poorly butchered piece of beef into something special — but it will make an already good cut even better, and it will unlock cuts that most home cooks give up on.
At A Place 2 Meat, every piece of beef is halal-certified, hormone-free, and hand-cut on site in Brisbane. Whether you’re after a premium rib eye that just needs the right heat, a rump steak that’ll benefit from a salt brine and careful slicing, or a brisket you’re planning to smoke low and slow on the weekend — the quality of the beef you start with sets the ceiling for what you can achieve.
Browse the full beef range at A Place 2 Meat and order online for delivery across Brisbane. Good beef, properly sourced and properly prepared, makes every method in this guide work better.