
About Us
Our meat is always fresh, hand-cut, delicious and prepared with care. We pride ourselves on the quality of meat we sell to our customers because we value you!
Contact Info
- 110/400 Newmarket Road, Newmarket QLD 4051
- +0738564216
- 110/400 Newmarket Road, Newmarket QLD 4051
- +0738564216
How to Get Crispy Chicken Skin: A Guide for Every Method
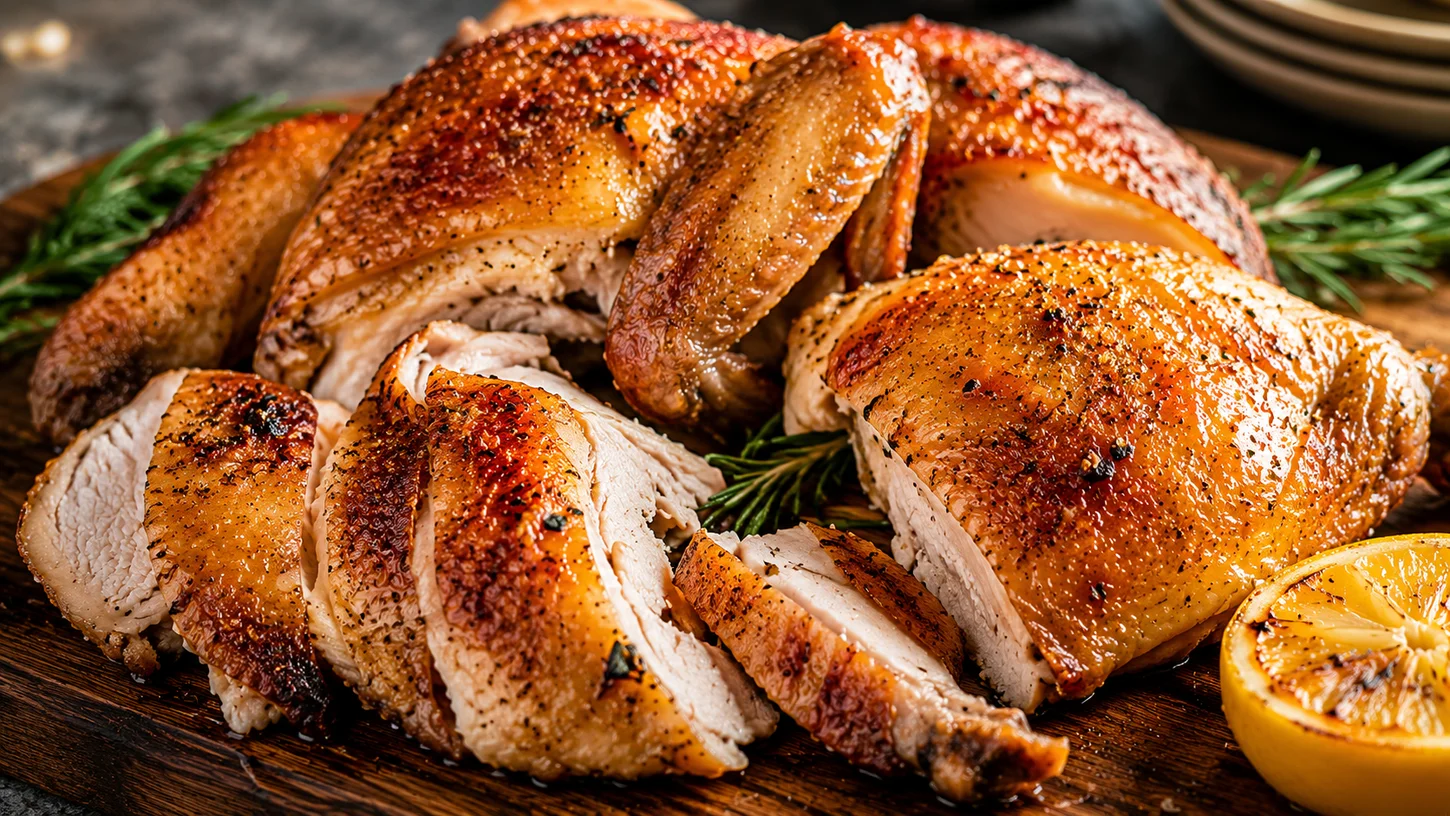
Golden, shatteringly crisp chicken skin is one of those things that can turn a simple meal into something memorable. But getting it right isn’t always straightforward—too often, what should be crunchy ends up rubbery, soggy, or unevenly cooked.
The good news? Crispy chicken skin isn’t about fancy equipment or complicated techniques. It’s about understanding a few key principles and applying them consistently, whether you’re roasting in the oven, pan-frying on the stovetop, or firing up the BBQ. This guide walks you through every method, every cut, and every trick you need to master crispy chicken skin at home.
Why Crispy Chicken Skin Is So Popular
The Appeal Of Golden, Crunchy Chicken Skin
There’s something undeniably satisfying about biting into perfectly crisped chicken skin. The contrast between the crackling exterior and tender meat underneath creates a textural experience that’s hard to beat. It’s why rotisserie chicken shops stay busy, why Korean fried chicken has taken over, and why home cooks keep searching for that perfect roast chicken recipe.
Crispy skin also carries flavour differently. The rendered fat, browned edges, and concentrated seasonings create layers of taste that soft or rubbery skin simply can’t deliver.
What Makes Crispy Skin Different From Rubbery Or Soggy Skin
The difference comes down to moisture and temperature. Crispy skin has had its moisture driven off and its fat rendered properly, leaving behind a thin, crunchy layer. Rubbery skin still contains too much moisture and undercooked collagen. Soggy skin usually means the chicken was cooked in too much liquid or at too low a temperature.
When chicken skin crisps properly, you can actually hear the crackle when you bite into it. That’s the sound of success.
Why Proper Technique Matters More Than Cooking Equipment
You don’t need a high-end oven or professional-grade equipment to achieve crispy chicken skin. What you need is patience, proper preparation, and attention to temperature control. A well-prepped chicken piece cooked in a basic oven will outperform an improperly prepared piece cooked in the fanciest air fryer every time.
The fundamentals—drying the skin, managing heat, and allowing fat to render—apply across every cooking method. Master these, and you’ll get consistent results no matter what equipment you’re using.
The Science Behind Crispy Chicken Skin
The Role Of Moisture In Preventing Crispness
Moisture is the enemy of crispy skin. When water is present on the surface, it needs to evaporate before the skin can begin to brown and crisp. This is why patting chicken dry before cooking is non-negotiable.
Chicken skin naturally contains moisture, and during cooking, more moisture is released from the meat beneath. If you don’t start with dry skin and use proper heat, you’ll end up steaming the chicken rather than crisping it.
How Fat Rendering Creates Crunchy Texture
Chicken skin contains a layer of fat between the skin and the meat. As this fat heats up, it begins to render (melt), which serves two purposes: it bastes the meat from the outside, keeping it moist, and it allows the skin itself to become thin and crispy.
Insufficient rendering leaves the skin thick, flabby, and unpleasant to eat. Proper rendering requires time and the right temperature—too low and the fat won’t render; too high and the skin burns before the fat can melt away.
Understanding The Maillard Reaction And Browning
The Maillard reaction is the chemical process that creates browning and develops complex flavours when proteins and sugars are exposed to heat. This reaction is what gives chicken skin its golden colour and savoury taste.
For the Maillard reaction to occur effectively, the surface needs to be relatively dry and the temperature needs to be high enough—generally above 140°C. This is why low-and-slow cooking methods (like smoking) often struggle to produce crispy skin without a finishing step.
Why Dry Skin Is The Foundation Of Every Method
Regardless of whether you’re roasting, frying, grilling, or air-frying, dry skin is where it all starts. Wet skin creates steam, which prevents browning and crisping. Every successful crispy chicken technique begins with removing as much surface moisture as possible.
This principle applies before you even think about seasoning, temperature, or cooking time. Get the skin dry, and you’re already halfway there.
Choosing The Best Chicken For Crispy Skin
Skin-On Versus Skinless Cuts
This one’s obvious: you need skin-on chicken if you want crispy skin. But it’s worth noting that not all skin-on chicken is equal. Look for chicken where the skin is intact, taut, and free from tears. Damaged skin won’t crisp evenly and can pull away during cooking.
A Place 2 Meat stocks fresh, skin-on cuts that are hand-prepared and halal-certified, giving you a solid starting point for crispy results.
Bone-In Or Boneless: Which Produces Better Results?
Bone-in chicken generally produces better crispy skin because the bone acts as a heat conductor and helps the meat cook more evenly. The bone also prevents the meat from overcooking while the skin crisps, giving you more margin for error.
Boneless cuts can still achieve excellent crispness, but they require more careful temperature management to avoid drying out the meat while waiting for the skin to crisp.
Whole Chicken, Wings, Thighs, Drumsticks, And Breasts Compared
Each cut behaves slightly differently:
- Whole chicken: Offers the most skin surface area and requires careful positioning to ensure even crisping, especially around the thighs and under the wings.
- Wings: Naturally fatty, wings crisp beautifully and quickly. They’re forgiving and ideal for beginners.
- Thighs: Dark meat stays moist longer, giving you more time to achieve crispy skin without drying out the meat.
- Drumsticks: Similar to thighs but with slightly less fat. Still excellent for crisping.
- Breasts: Lean and prone to drying out. These require more attention to avoid overcooking the meat while crisping the skin.
If you’re new to crispy chicken skin, start with free-range chicken thighs or free-range chicken wings—they’re the most forgiving cuts.
Why Quality Chicken Makes A Difference
Free-range, hormone-free chicken tends to have firmer, more substantial skin that crisps better than conventionally raised poultry. The skin texture, fat content, and overall structure of well-raised chicken simply performs better under heat.
Quality chicken also tastes better once crisped. The difference between rubbery supermarket chicken skin and properly crisped free-range skin is night and day.
Essential Preparation Steps Before Cooking
Patting The Chicken Dry Properly
Use paper towels to thoroughly pat down every inch of the chicken skin. Press firmly to absorb as much moisture as possible. Don’t just give it a quick wipe—really dry it.
If the paper towels are soaking through, use more. The goal is to get the skin as dry as you can before moving to the next step.
Dry Brining For Better Flavour And Texture
Dry brining involves salting the chicken and letting it rest, uncovered, in the refrigerator for several hours or overnight. The salt draws moisture to the surface, which then evaporates, leaving behind concentrated flavour and drier skin.
Use about 1 teaspoon of salt per kilogram of chicken. Rub it evenly over the skin and let it sit uncovered in the fridge for at least 4 hours, though 12 to 24 hours is better.
Air-Drying Chicken In The Refrigerator
Even without salt, air-drying chicken in the refrigerator helps remove surface moisture. Place the chicken on a wire rack set over a tray and leave it uncovered in the fridge for several hours. The cold, dry air of the refrigerator pulls moisture from the skin, creating a drier surface for crisping.
This technique works particularly well for whole chickens and larger cuts.
When To Use Baking Powder For Extra Crispness
Baking powder (not baking soda) raises the pH of the chicken skin, which accelerates browning and crisping. It’s particularly useful for smaller cuts like wings or drumsticks.
Mix about 1 teaspoon of baking powder per kilogram of chicken with your dry seasonings. The skin will crisp faster and develop a deeper golden colour. Make sure to use aluminium-free baking powder to avoid any metallic taste.
Common Preparation Mistakes To Avoid
Don’t rinse chicken before cooking—it spreads bacteria and adds unnecessary moisture. Don’t season too early if you’re not dry brining, as wet seasonings can prevent crisping. And don’t skip the drying step, even if you’re in a hurry. A few extra minutes of prep will save you from disappointing results.
How to Get Crispy Chicken Skin in the Oven
Best Oven Temperatures For Crispy Results
For most chicken cuts, a temperature between 200°C and 220°C works well. This range is hot enough to render fat and promote browning without burning the skin.
Whole chickens often benefit from starting at a higher temperature (220°C) for the first 20 minutes, then reducing to 180°C to finish cooking through. This gives you a head start on crisping while ensuring the meat cooks evenly.
Using A Wire Rack For Improved Airflow
Place chicken on a wire rack set over a baking tray. This allows hot air to circulate underneath, preventing the bottom from sitting in rendered fat and becoming soggy. It’s a simple step that makes a noticeable difference.
If you don’t have a wire rack, you can prop the chicken up on vegetables like halved onions or thick carrot rounds.
Roasting Whole Chickens For Even Crispness
For a whole chicken, dry the skin thoroughly, season well, and truss the legs if desired to promote even cooking. Start breast-side up at 220°C for 20 minutes, then reduce to 180°C and roast until the internal temperature reaches 75°C in the thickest part of the thigh.
Let the chicken rest for 10 minutes before carving. The skin will continue to crisp slightly as it cools.
Achieving Crispy Skin On Chicken Pieces
Arrange pieces skin-side up on the rack, leaving space between each piece for airflow. Avoid overlapping. Roast at 200°C until the skin is golden and the meat reaches a safe internal temperature (75°C for dark meat, 65°C for breast meat).
If the skin isn’t as crispy as you’d like, finish under the grill for 2-3 minutes, watching closely to prevent burning.
Tips For Preventing Burnt Or Uneven Skin
If parts of the chicken are browning too quickly, tent those areas loosely with foil. Rotate the tray halfway through cooking to account for hot spots in your oven. And resist the urge to open the oven door constantly—every time you do, you lose heat and extend the cooking time.
How to Get Crispy Chicken Skin in a Frying Pan
Choosing The Right Pan
A heavy-based frying pan or cast-iron skillet works best. These pans retain heat well and distribute it evenly, which helps achieve consistent browning. Avoid thin, lightweight pans that develop hot spots.
Make sure your pan is large enough that the chicken pieces aren’t crowded. If necessary, cook in batches.
Starting Skin-Side Down For Maximum Fat Rendering
Place the chicken in the pan skin-side down and leave it alone. Don’t move it, flip it, or fidget with it. The skin needs uninterrupted contact with the hot surface to render fat and develop a crust.
Depending on the thickness of the chicken, this can take 10-15 minutes over medium heat. You’ll know it’s ready to flip when the skin releases easily from the pan and has a deep golden colour.
Managing Heat For Even Browning
Medium to medium-high heat works best. Too high and the skin burns before the fat renders; too low and the skin steams rather than crisps. You want to hear a gentle sizzle, not aggressive popping or silence.
If the skin starts to darken too quickly, reduce the heat slightly. If it’s not browning after 5 minutes, increase the heat a touch.
Finishing In The Oven For Perfect Results
Once the skin is crispy, flip the chicken and transfer the pan to a preheated oven at 180°C to finish cooking through. This method gives you the best of both worlds: perfectly crisped skin from the stovetop and evenly cooked meat from the oven.
Check the internal temperature to ensure the meat is fully cooked before serving.
Avoiding Sticking And Tearing
Make sure the pan is hot before adding the chicken. A properly heated pan is less likely to cause sticking. Don’t try to flip the chicken too early—if it’s sticking, it’s not ready. The skin will release naturally once it’s developed a proper crust.
Using a small amount of oil helps, but don’t drown the chicken. A thin film is all you need.
How to Get Crispy Chicken Skin in an Air Fryer
Why Air Fryers Excel At Crisping Chicken
Air fryers work by circulating hot air rapidly around the food, which accelerates moisture evaporation and browning. They’re particularly effective for smaller cuts like wings, drumsticks, and thighs.
The confined space and powerful airflow mean you can achieve crispy skin without needing much (or any) added oil.
Recommended Temperatures And Cooking Times
Set your air fryer to 200°C. For wings, cook for 20-25 minutes, flipping halfway through. For drumsticks and thighs, cook for 25-30 minutes. For bone-in chicken breasts, 20-25 minutes usually does the trick.
Always check the internal temperature to ensure the chicken is fully cooked.
Preventing Overcrowding In The Basket
This is critical. If the basket is packed too tightly, the air can’t circulate properly, and you’ll end up with patchy results. Leave space between each piece. Cook in batches if necessary—it’s worth the extra time.
Best Air Fryer Chicken Cuts For Crispy Skin
Wings and drumsticks are ideal for air fryers. They’re small, cook evenly, and crisp beautifully. Thighs also work well. Whole chickens are trickier due to size constraints, and breasts require careful monitoring to avoid drying out.
If you’re stocking up for air fryer cooking, grab a pack of free-range chicken drumsticks—they’re perfect for this method.
Air Fryer Troubleshooting Tips
If your skin isn’t crisping, the chicken might still be too wet. Make sure you’ve dried it thoroughly before cooking. If it’s cooking unevenly, flip the pieces more frequently. And if the skin is browning too fast, reduce the temperature by 10-20°C and extend the cooking time.
How to Get Crispy Chicken Skin on the BBQ or Grill
Direct Versus Indirect Heat Cooking
For crispy skin, you’ll want to use indirect heat for most of the cooking time, then finish over direct heat for a final crisp and char. Cooking entirely over direct heat often results in burnt skin and raw meat.
Set up your BBQ with a hot zone and a cooler zone. Start the chicken on the cooler side to cook through, then move it to the hot side to crisp the skin.
Rendering Fat Without Burning The Skin
Fat dripping onto hot coals or burners can cause flare-ups, which burn the skin. Keep the chicken on the cooler side of the grill while the fat renders, and only move it to the hot zone once the skin has started to crisp.
Managing Flare-Ups And Hot Spots
Keep a spray bottle of water handy to tame flare-ups. Move the chicken away from hot spots if certain areas are cooking too quickly. And keep the lid closed as much as possible to maintain even heat.
When To Add Sauces And Glazes
Apply sauces and glazes only in the final few minutes of cooking. Sugar-based sauces burn easily, so adding them too early will ruin your crispy skin. If you want a sticky, caramelised glaze, brush it on in the last 5 minutes and watch closely.
Tips For Rotisserie Chicken With Crispy Skin
Rotisserie cooking is excellent for even crisping because the chicken rotates constantly, allowing fat to baste the skin while heat hits every surface. Make sure the chicken is trussed tightly so it spins evenly, and position it over indirect heat.
Rotisserie chickens benefit from dry brining the night before and cooking at a moderate temperature (around 180°C) for 60-90 minutes, depending on size.
How to Get Crispy Chicken Skin on a Smoker
Why Smoked Chicken Skin Can Turn Rubbery
Smoking happens at low temperatures (usually 110-135°C), which isn’t hot enough to render fat or crisp the skin effectively. The prolonged exposure to moist smoke also adds surface moisture, making crispy skin even harder to achieve.
Without intervention, smoked chicken skin often ends up thick, chewy, and unappetising.
Choosing The Right Smoking Temperature
If crispy skin is a priority, smoke at the higher end of the range—around 135-150°C. This won’t give you the same deep smoke penetration as lower temperatures, but it will help the skin crisp up while still imparting smoke flavour.
Finishing Techniques For Extra Crispness
After smoking, finish the chicken in a hot oven (220°C) or over direct heat on the grill for 10-15 minutes. This step crisps the skin without losing the smoke flavour you’ve built up.
Alternatively, use a kitchen blowtorch to crisp the skin directly. It’s quick and gives you precise control.
Combining Smoke Flavour With Crunchy Texture
Smoke for the first hour or two to build flavour, then increase the heat or move the chicken to a hotter environment to finish crisping. This hybrid approach gives you the best of both worlds.
Some pitmasters also dry brine and air-dry smoked chicken overnight to give the skin a head start on drying before it even hits the smoker.
Advanced Crispy Chicken Skin Techniques From Around the World
Cantonese Air-Drying And Skin-Tightening Methods
Cantonese roast chicken is famous for its shatteringly crisp skin. The secret involves pouring boiling water over the chicken skin to tighten it, then air-drying it for several hours (or overnight) in front of a fan.
This technique shrinks the skin and removes moisture, creating an ultra-thin layer that crisps beautifully when roasted at high heat.
Chinese Roast Chicken Techniques Using Vinegar And Maltose
Another Chinese method involves brushing the chicken skin with a mixture of vinegar (to tighten the skin) and maltose or honey (to promote browning and caramelisation). The chicken is then air-dried and roasted at high heat.
The vinegar evaporates quickly, leaving behind a taut, dry surface that crisps to perfection.
Korean Double-Frying For Ultra-Crispy Skin
Korean fried chicken is double-fried: once at a lower temperature (around 160°C) to cook the meat and render fat, then again at a higher temperature (around 180°C) to crisp the skin and coating.
This method works brilliantly for boneless chicken pieces and wings. The first fry cooks everything through without excessive browning, and the second fry delivers that signature crunch.
Japanese Yakitori And Chicken Skin Skewer Techniques
In Japan, chicken skin is sometimes grilled on its own as yakitori. The skin is skewered, brushed with tare sauce, and grilled over charcoal until crispy and caramelised.
The key is constant basting and turning to prevent burning while allowing the fat to render completely. It’s a labour-intensive approach, but the results are exceptional.
Southern Fried Chicken And Buttermilk Brining Approaches
Southern fried chicken often involves soaking chicken in buttermilk (sometimes with hot sauce) before dredging and frying. The acidity in the buttermilk tenderises the meat, while the frying process creates a crispy, golden crust.
For extra crunch, some recipes incorporate baking powder or cornflour into the dredge mixture.
Rotisserie And Charcoal-Roasting Methods Used By Restaurants
Professional rotisserie setups often use high heat and constant rotation to achieve evenly crisped skin. Charcoal roasting adds a smoky char while the rotating motion bastes the chicken in its own rendered fat.
Home cooks can replicate this with a Weber-style kettle grill set up for rotisserie cooking.
Common Reasons Chicken Skin Fails to Crisp
Too Much Surface Moisture
This is the number one culprit. If the chicken wasn’t dried properly, or if it’s been sitting in marinade right up until cooking, the skin won’t crisp. Always dry the chicken thoroughly before cooking.
Cooking At The Wrong Temperature
Too low and the skin won’t brown or crisp; too high and it burns before the meat cooks through. Most methods require temperatures between 180°C and 220°C for optimal results.
Applying Sauce Too Early
Wet sauces add moisture and sugar, both of which prevent crisping if applied too early. Save sauces for the final few minutes of cooking, or serve them on the side.
Overcrowding The Cooking Surface
Whether it’s a baking tray, frying pan, or air fryer basket, overcrowding traps steam and prevents proper browning. Give each piece of chicken space to breathe.
Skipping Resting And Drying Steps
Rushing through prep rarely pays off. Dry brining, air-drying, and even just a thorough pat-down take time, but they’re what separate crispy skin from disappointing results.
Crispy Chicken Skin Tips for Different Cuts
Chicken Wings
Wings are naturally fatty and crisp easily. Dry them well, season generously, and cook at 200°C in the oven or air fryer for 25-30 minutes, flipping halfway. Baking powder in the seasoning mix adds extra crunch.
Wings are forgiving and ideal for experimenting with different techniques.
Chicken Thighs
Thighs have more fat than breasts, which helps keep the skin crispy while the meat stays moist. Start skin-side down in a pan to render the fat, then finish in the oven. Or roast them skin-side up on a rack at 200°C.
Thighs are one of the most forgiving cuts for achieving crispy skin.
Drumsticks
Drumsticks work similarly to thighs but benefit from slightly longer cooking times due to their shape. Roast or air-fry at 200°C for 30-35 minutes, turning once or twice for even browning.
The uneven shape can lead to some areas crisping faster than others, so keep an eye on them.
Chicken Breasts
Breasts are lean and dry out easily, making them the trickiest cut for crispy skin. Use bone-in, skin-on breasts, and cook them gently. Start skin-side down in a pan, then finish in the oven at 180°C.
Check the internal temperature frequently and remove them as soon as they hit 65°C to avoid drying out.
Whole Roast Chicken
Whole chickens require the most attention because different parts cook at different rates. Dry brine overnight, roast breast-side up at 220°C for 20 minutes, then reduce to 180°C until fully cooked.
Focus on getting the thighs crispy first—the breast skin will follow.
Best Seasonings and Marinades for Crispy Chicken Skin
Dry Rubs That Won’t Compromise Crispness
Dry rubs made from salt, pepper, garlic powder, onion powder, paprika, and dried herbs work perfectly with crispy skin. They add flavour without adding moisture.
Avoid sugar-heavy rubs, as they can burn before the skin crisps. If using sugar, keep it minimal.
How Salt Enhances Texture And Flavour
Salt doesn’t just season—it actively improves texture by drawing out moisture and tightening the skin. Whether you’re dry brining overnight or just salting before cooking, it’s one of the most important steps.
Use flaky sea salt for finishing, but fine salt for dry brining to ensure even distribution.
Using Herbs, Spices, And Aromatics Effectively
Fresh herbs like rosemary, thyme, and sage can be tucked under the skin to infuse the meat without interfering with crispness. Dried herbs and spices can be rubbed directly onto the skin.
Garlic, lemon zest, and chilli flakes all work beautifully as part of a dry rub.
Managing Wet Marinades Without Sacrificing Crunch
If you’re using a wet marinade, make sure to pat the chicken dry thoroughly before cooking. Better yet, marinate the chicken for flavour, then scrape off excess marinade and let the chicken air-dry in the fridge for a few hours before cooking.
Alternatively, use the marinade as a finishing sauce rather than cooking the chicken in it.
When To Apply Glazes, Sauces, And Finishing Coatings
Apply glazes only in the final 5-10 minutes of cooking. This allows the skin to crisp first, then adds a sticky, caramelised coating without preventing the crispness from forming.
Brush lightly—too much glaze will create a soggy mess.
Serving Crispy Chicken Skin Without Losing the Crunch
Why Resting Matters
Resting allows the meat’s juices to redistribute, but it also gives the skin time to firm up slightly as it cools. Rest chicken for 5-10 minutes before serving.
Don’t cover the chicken tightly with foil while resting, as trapped steam will soften the skin. Tent it loosely or leave it uncovered.
Keeping Skin Crisp Before Serving
If you need to hold cooked chicken for a while before serving, keep it in a low oven (around 100°C) on a wire rack. This keeps it warm without steaming the skin.
Avoid covering it or stacking pieces on top of each other.
Best Side Dishes To Pair With Crispy Chicken
Crispy chicken pairs well with fresh, bright sides that contrast the richness of the skin. Think green salads, roasted vegetables, coleslaw, or pickled vegetables.
Avoid overly saucy sides that might drip onto the chicken and compromise the crispness.
Storing And Reheating Leftovers
Store leftover chicken in an airtight container in the fridge. To reheat and re-crisp, place it on a wire rack in a 200°C oven for 10-15 minutes. Avoid microwaving, which will make the skin rubbery.
If the skin has lost its crispness, a quick stint under the grill can bring it back to life.
Frequently Asked Questions About Crispy Chicken Skin
Can You Make Crispy Chicken Skin Without Oil?
Yes. Chicken skin contains enough fat on its own to render and crisp without added oil. Dry the skin well, use high enough heat, and let the natural fat do the work.
That said, a light brushing of oil can help seasonings stick and promote even browning.
Is Baking Powder Better Than Cornflour?
Baking powder is generally more effective for crisping chicken skin because it raises the pH, which accelerates browning. Cornflour can help absorb surface moisture and create a light coating, but it doesn’t affect the skin’s chemistry the way baking powder does.
For best results, use baking powder mixed with your dry seasonings.
How Long Should You Dry Brine Chicken?
At least 4 hours, but ideally 12-24 hours. The longer the chicken sits with salt, the more moisture is drawn out and the more the skin tightens.
If you’re short on time, even an hour of dry brining is better than none.
Why Is My Chicken Skin Crispy In Some Spots But Not Others?
Uneven crisping usually comes from uneven contact with heat. Make sure the chicken is positioned so the skin is exposed to direct heat or airflow. Rotate the chicken or tray halfway through cooking to compensate for hot spots.
Overcrowding can also cause patchy results.
Can You Re-Crisp Chicken Skin After Cooking?
Yes. Reheat the chicken in a hot oven (200°C) on a wire rack for 10-15 minutes, or finish it under the grill for a few minutes. A kitchen blowtorch also works well for spot-crisping.
Avoid microwaving, which will make the skin rubbery.
Achieving Perfect Crispy Chicken Skin Every Time
The Key Principles That Apply To Every Cooking Method
Dry the skin thoroughly, use adequate heat, allow fat to render, and avoid adding moisture too early. These principles hold true whether you’re roasting, frying, grilling, smoking, or air-frying.
Master these fundamentals, and you’ll achieve consistent results regardless of the method.
Choosing The Right Technique For Your Preferred Cooking Style
If you love smoky flavour, use the smoker with a high-heat finish. If you want simplicity, roast in the oven. If speed is a priority, reach for the air fryer. Each method has its strengths, and once you understand the principles, you can adapt them to suit your preferences.
Experiment with different cuts and techniques until you find what works best for your kitchen and taste.
Starting With Quality Chicken For The Best Results
Quality matters. Free-range, hormone-free chicken has better skin texture, more flavour, and crisps more reliably than conventionally raised poultry. When you start with better ingredients, everything else becomes easier.
Crispy Chicken Skin Starts With Quality Free-Range Chicken
Technique matters, but so does the chicken itself. A Place 2 Meat stocks fresh, free-range, halal-certified chicken that’s hand-cut on-site and never pumped with hormones. Whether you’re after wings for the air fryer, thighs for the pan, drumsticks for the oven, or a whole bird for Sunday roast, you’ll notice the difference as soon as you open the pack.
Order online from A Place 2 Meat and bring home chicken that’s ready to crisp to perfection. Your next golden, crunchy, flavour-packed meal is just a few clicks away, with fresh Brisbane delivery available.
🥩 Get Farm-Fresh Australian Chicken for Golden, Crispy Skin
Whether roasting a whole chicken or air-frying wings and thigh cutlets, get hormone-free, halal-certified poultry prepped daily in Newmarket.
Related Articles
Techniques for Juicy and Tender Chicken Breasts
How Long to Cook Chicken Wings: A Guide for Every Method
How to Cook a Whole Chicken: A Guide for Every Method
How Long to Cook Chicken Thighs: A Guide for Every Method
How Long to Cook Chicken Drumsticks: A Guide for Every Method