
About Us
Our meat is always fresh, hand-cut, delicious and prepared with care. We pride ourselves on the quality of meat we sell to our customers because we value you!
Contact Info
- 110/400 Newmarket Road, Newmarket QLD 4051
- +0738564216
- 110/400 Newmarket Road, Newmarket QLD 4051
- +0738564216
Yakitori Chicken Thighs (Momo Yakitori)
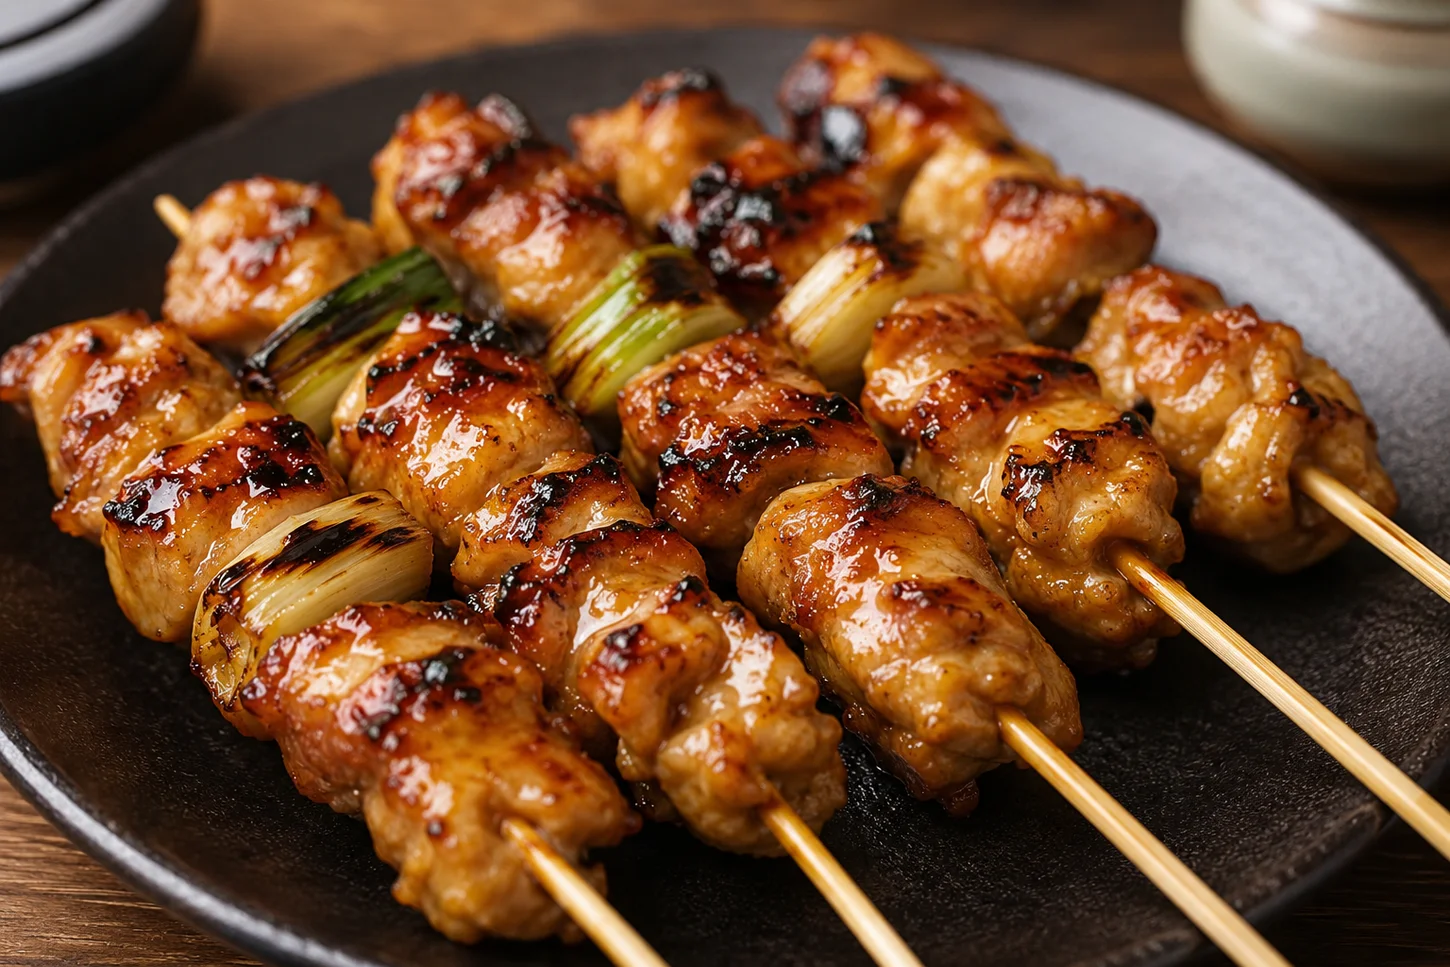
Yakitori is one of Japan’s most beloved street foods — bite-sized pieces of chicken threaded onto skewers and grilled over high heat until the edges char and a glossy sauce caramelises against the meat. It’s simple, deeply satisfying, and surprisingly easy to recreate at home.
When it comes to yakitori, not all cuts are equal. Momo — chicken thigh — is widely considered the best cut for the job, and for good reason. Thigh meat is naturally juicy, rich in flavour, and holds up to the kind of heat that makes yakitori worth eating. Unlike lean chicken breast, momo stays tender under the grill, absorbs the tare sauce beautifully, and develops those caramelised, slightly charred edges that define a great skewer.
This recipe walks through everything you need to make a solid plate of momo yakitori at home, from building the tare to threading the skewers. Starting with quality free-range chicken thighs from A Place 2 Meat gives you the best possible foundation — fresh, properly sourced meat that actually tastes like chicken.
Done right, you’re looking at juicy chicken with caramelised edges, a hint of smoky char, and a sweet-savoury glaze that pulls everything together.
What Is Momo Yakitori?
What Does “Momo” Mean in Yakitori?
In yakitori, momo refers to chicken thigh. It’s one of the most commonly ordered cuts at yakitori restaurants and a staple of any decent skewer menu.
Yakitori menus break chicken down into distinct cuts, each with its own name and character. A few of the most common ones you’ll encounter:
| Cut | Japanese Name | Description |
| Chicken thigh | Momo | Rich, juicy, forgiving — the most popular cut |
| Chicken and spring onion | Negima | Alternating chicken and Welsh onion |
| Chicken meatball | Tsukune | Ground chicken formed into a patty or ball on a skewer |
| Chicken tail | Bonjiri | Fatty and flavourful, a popular yakitori-bar favourite |
| Chicken skin | Kawa | Crispy skin skewers, often grilled until crunchy |
Thigh meat earns its popularity because it’s genuinely well-suited to the cooking method. The fat content keeps it moist over high heat, the texture holds together on a skewer, and it takes on flavour readily — whether you’re seasoning with salt or building a proper tare glaze.
What Is Yakitori?
Yakitori literally translates to “grilled bird.” At its core, it’s a style of Japanese cooking where small pieces of chicken are skewered and cooked over direct heat — traditionally charcoal, though a gas barbecue or grill works well at home.
The skewers are seasoned in one of two ways:
- Shio (塩) — salt seasoning. Simple, clean, and lets the natural flavour of the chicken take centre stage.
- Tare (タレ) — a glaze made from soy sauce, mirin, sake and sugar, reduced until glossy and concentrated. Applied during the final stages of cooking, it caramelises against the chicken and builds a rich, layered flavour.
This recipe focuses on tare-style momo yakitori — the glazed version that most people are familiar with and the one that’s hardest to stop eating.
Why Chicken Thighs Are Perfect for Yakitori
Juicier Than Chicken Breast
Chicken thigh contains more intramuscular fat than breast meat, and that fat does a lot of work during cooking. It bastes the meat from the inside as it renders, which means the chicken stays moist even when exposed to the direct, intense heat of a grill or barbecue.
Breast meat has far less fat, which makes it more prone to drying out before the exterior has time to develop colour. For yakitori — where browning, charring and glazing are all part of the process — thigh meat is simply the more reliable choice.
Ideal for High-Heat Grilling
Grilled chicken thighs can handle high temperatures without falling apart or seizing up. As the fat renders out, it contributes directly to the flavour of the finished skewer — you get browning, a little char on the edges, and a richness that lean cuts can’t replicate.
That rendered fat also helps the tare glaze cling to and caramelise against the meat, which is exactly what you want in a good yakitori skewer.
Great for Marinades and Glazes
Cut into bite-sized pieces, chicken thighs offer plenty of surface area for the tare to coat. When you brush the sauce on during grilling and allow it to caramelise, you end up with layers of flavour — the savoury depth of soy sauce, the sweetness of the sugar, and the natural juices of the chicken all working together.
The result is a sticky, glossy exterior with a tender interior — which is the whole point of yakitori.
Choosing Quality Chicken Thighs
The quality of your chicken matters more in a simple recipe like this than in a heavily spiced or slow-cooked dish. With only a handful of ingredients and a straightforward cooking method, the chicken itself carries the flavour.
A Place 2 Meat stocks fresh, free-range chicken thighs that are cut on-site and available online for Brisbane customers. Starting with good chicken — properly sourced, fresh, not pumped — gives the dish a noticeably better result. You can order their free range chicken thighs directly through the website.
Ingredients for Momo Yakitori
For the Chicken Skewers
- Free-range chicken thighs (boneless, skin-on or skinless)
- Spring onions or Japanese negi (optional — for alternating on the skewer)
- Bamboo skewers
- Neutral cooking oil (if needed — a light brush on the grill)
For the Yakitori Tare Sauce
- Soy sauce — the savoury, salty backbone of the tare
- Mirin — adds sweetness and helps the glaze develop shine; use a non-alcoholic mirin alternative if needed
- Sake — adds depth and a subtle umami quality; substitute with rice wine vinegar mixed with a little water and extra sugar for a halal-friendly version
- Brown sugar or caster sugar — balances the salt and helps the sauce reduce to a syrupy consistency
- Ginger (optional) — adds a subtle warmth and fragrance
- Garlic (optional) — rounds out the savoury flavour
- Spring onion tops (optional) — infuse a mild onion note during simmering, then remove before use
The finished tare should taste salty, savoury and lightly sweet — not cloying. It should coat the back of a spoon and leave a glossy layer on the chicken when applied. If it tastes overwhelmingly sweet, the balance is off; adjust with a little more soy sauce.
Optional Garnishes and Seasonings
- Shichimi togarashi — Japanese seven-spice blend; adds heat and complexity
- Sliced spring onions — fresh contrast against the rich glaze
- Toasted sesame seeds — a little texture and a nutty note
- Sansho or Japanese pepper — subtle citrusy heat
- Lemon wedges — a squeeze of acid brightens the finished skewer
How to Make Yakitori Tare
The tare is the foundation of this recipe. It’s worth making a slightly larger batch than you need so you have clean sauce reserved for serving.
Combine the Sauce Ingredients
Add soy sauce, mirin, sake (or substitute), and sugar to a small saucepan. Stir to dissolve the sugar before turning on the heat. If using aromatics like ginger, garlic or spring onion tops, add them now.
Simmer Until Thick and Glossy
Bring the mixture to a gentle simmer over medium heat. Allow it to reduce, stirring occasionally, until it thickens slightly and takes on a glossy, syrupy consistency. This typically takes around 10–15 minutes depending on the quantity.
Don’t walk away — tare can catch and burn quickly once the sugar concentrates. Keep the heat moderate and watch the pot.
The sauce will continue to thicken as it cools, so pull it off the heat before it becomes too thick in the pan. Strain out any aromatics and allow it to cool slightly before use.
Set Aside Some Tare for Serving
Before you start cooking, divide your tare into two portions:
- Cooking tare — used for brushing onto the chicken while it grills
- Finishing tare — kept clean and served alongside the finished skewers
Once the cooking tare has been in contact with raw chicken, it shouldn’t be served at the table. Keep the finishing portion separate and use clean utensils throughout. This is a straightforward food safety step but an easy one to skip if you’re not thinking ahead.
How to Prepare Chicken Thighs for Yakitori
Remove Excess Skin, Fat and Tough Pieces
Trim the chicken thighs, but don’t go overboard. Some natural fat is desirable — it keeps the meat moist during grilling and contributes to the browning and flavour. What you want to remove are any tough connective bits, sinew, or cartilage that would be unpleasant to bite through on a skewer.
If your thighs are skin-on and you want to include the skin, that’s a perfectly valid choice. The skin renders and crisps a little during grilling and adds richness.
Cut the Chicken Into Even Pieces
Cut each thigh into approximately 3–4 cm bite-sized pieces. Consistent sizing is important — pieces that are too large will be undercooked in the centre by the time the exterior is done, while pieces that are too small will dry out quickly.
A sharp knife and a quick eye for consistency will get you there. You don’t need to be precise to the millimetre, but try to keep things reasonably uniform across the batch.
Pat the Chicken Dry
Use paper towels to remove excess moisture from the surface of the chicken pieces before threading them. Dry chicken browns and chars more effectively than wet chicken — moisture on the surface creates steam, which works against the caramelisation you’re aiming for.
This step matters most when you’re grilling over high heat, which is exactly the scenario with yakitori.
How to Assemble Momo Yakitori Skewers
Soak Wooden Skewers
If using bamboo skewers over an open flame or barbecue, soak them in cold water for at least 30 minutes before use. This helps prevent the exposed ends from burning during cooking. A shallow tray or a tall glass works well for soaking.
Metal skewers don’t need soaking, but they conduct heat — be careful when handling.
Thread the Chicken Onto the Skewers
Thread the pieces closely together, working through the thicker part of each piece so they sit flat and stable. You want enough contact between pieces to hold the skewer together, but don’t compress them so tightly that heat can’t reach the sides.
If you’re making a spring onion version, fold short lengths of spring onion and alternate them between the chicken pieces — it’s the classic negima approach applied to a thigh cut.
Avoid Overloading the Skewers
Four to five pieces of chicken per skewer is a reasonable amount. More than that and the skewer becomes awkward to turn, which makes even cooking harder. Leave a few centimetres of clear skewer at the handle end so you have something to hold without burning your fingers.
How to Cook Yakitori Chicken Thighs
Grilling Yakitori on the BBQ
Preheat the barbecue to medium-high to high heat. If using a grill plate, make sure it’s properly preheated and clean before adding the skewers — a hot, clean grill reduces sticking.
Place the skewers down and turn them regularly, every 1–2 minutes, to develop colour on all sides. The goal in the early stages is to cook the chicken through and develop some browning without burning. You’ll add the tare later.
Allow the chicken to develop lightly charred edges — that’s part of what makes yakitori taste like yakitori. A completely pale skewer means insufficient heat; excessive blackening means the heat was too high or the chicken sat too long in one position.
When to Add the Yakitori Tare
The tare should not go on early. The sugar in the sauce will burn before the chicken is cooked through if applied too soon, leaving you with a blackened exterior and undercooked centre.
Grill the skewers most of the way through first — typically once you’ve turned them a few times and the chicken is mostly cooked — then begin brushing with tare. Turn the skewers and brush again, building up a few layers of glaze over the final 2–3 minutes. Each coat caramelises slightly before the next one goes on, which is how you get that deep, glossy finish.
Traditional yakitori technique introduces the tare during the later stages of cooking, helping create a caramelised exterior without allowing the sauce to burn prematurely.
How to Cook Yakitori Under the Grill or Broiler
If you’re cooking indoors, the grill or broiler element of your oven is a good option. Position the skewers on a wire rack set over a lined tray, and place them close to the element.
Turn the skewers every few minutes and watch the chicken carefully. Broiler heat can be intense and uneven, so check for browning regularly. Apply the tare during the last few minutes of cooking — the sugar-rich glaze can darken quickly under a broiler, so don’t leave the kitchen.
How to Cook Yakitori in the Oven
For readers who don’t have a barbecue or accessible broiler, the oven offers a workable alternative.
Set the oven to 200°C fan-forced and place the skewers on a wire rack over a lined baking tray. This allows heat to circulate around the chicken rather than having it sit in its own juices.
Cook for approximately 20–25 minutes, turning the skewers halfway through. Apply the tare during the last 5–8 minutes and switch to the grill/broiler function briefly at the end to develop colour and a little char. Keep a close eye on the glaze during this final stage.
How to Tell When Yakitori Chicken Is Done
Check the Thickest Piece of Chicken
Colour alone isn’t a reliable indicator of doneness, particularly with glazed yakitori where the tare adds colour of its own. A thermometer is the most reliable tool for the job.
Check the thickest piece on the batch — if that one is done, everything else should be as well.
Safe Internal Temperature for Chicken
Chicken should reach an internal temperature of 75°C at the thickest point. Insert the thermometer into the centre of the thickest piece, ensuring it isn’t touching the skewer itself, which will give a false reading.
This is the standard safe temperature for cooked chicken, consistent with food safety guidance and the cooking advice A Place 2 Meat provides across their chicken range.
Don’t Overcook the Chicken
Once the chicken has reached 75°C, remove it from the heat. Thigh meat is more forgiving than breast, but overcooking will still reduce its tenderness and juiciness. Allow the skewers to rest for a minute or two before serving — the internal temperature will continue to rise slightly off the heat.
Tips for Perfect Yakitori Chicken Thighs
Use Fresh, Quality Chicken
The quality of the chicken is the single biggest variable in this recipe. With minimal ingredients and a simple technique, fresh, properly sourced chicken makes a noticeable difference. A Place 2 Meat‘s free-range chicken thighs are cut fresh on-site — the right starting point for a recipe that puts the chicken front and centre.
Cut the Pieces Evenly
Consistent sizing leads to more even cooking. If pieces vary significantly in size, smaller ones will be overcooked by the time the larger ones are done. Take a few extra seconds when cutting.
Don’t Skip Drying the Chicken
Moisture on the surface of the chicken inhibits browning. Pat each piece dry before threading — it takes 30 seconds and makes a genuine difference to the finished skewer.
Don’t Baste With Tare Too Early
Sugar burns. Adding the tare too early means you’ll have a blackened exterior before the chicken is cooked through. Hold off until the chicken is nearly done, then apply the tare in layers during the final few minutes.
Keep Turning the Skewers
Frequent turning — every minute or so during the initial grilling stage — promotes even cooking and helps develop colour on all sides without concentrating heat on one face.
Don’t Crowd the Grill
Leave enough space between skewers for heat to circulate. Overcrowded skewers steam rather than grill, which works against the browning and char you’re after.
Make Extra Tare
Tare keeps well in the refrigerator for several weeks. Making a larger batch means you’ll have clean finishing sauce at the table and reserve for future batches. Store it in a sealed jar or container once cooled.
What to Serve With Momo Yakitori
Japanese Steamed Rice
Plain steamed rice is the natural companion. It absorbs the tare and chicken juices without competing with the flavour of the skewers. Short-grain Japanese rice works particularly well here.
Yakitori-Style Vegetables
A few vegetables on skewers alongside the chicken make this a more complete meal without much extra effort:
- Grilled spring onions — sweet and smoky when charred; a classic combination with yakitori
- Shiitake mushrooms — meaty texture, earthy flavour, works well with tare
- Capsicum — adds colour and a slight sweetness
- Eggplant — softens beautifully over high heat; brush with a little oil first
Japanese Cucumber Salad
A fresh cucumber salad — thinly sliced, dressed with rice vinegar, a little sugar and sesame oil — provides a clean, crunchy contrast to the richness of the glazed chicken. It also helps balance the salt from the tare.
Miso Soup
A simple miso soup rounds out the meal and keeps things within a Japanese-style spread without requiring much additional cooking. Instant miso paste works fine here.
Shichimi Togarashi
A light dusting of shichimi togarashi on the finished skewers adds a layer of heat and spice that works well against the sweetness of the tare. It’s worth having on the table for anyone who wants it.
Variations on Chicken Thigh Yakitori
Salt-Grilled Momo Yakitori (Shio Style)
Skip the tare entirely. Season the chicken pieces generously with salt before threading, grill over high heat, and let the natural flavour of the chicken do the work. Shio yakitori is a good option when you want something a little lighter and less sweet. A squeeze of lemon at the end is the only addition needed.
Chicken and Spring Onion Yakitori
The classic negima combination applied to thigh meat — alternate pieces of chicken with folded segments of spring onion on the skewer. The spring onion chars slightly on the outside while softening inside, and its mild sweetness contrasts well with the savoury chicken.
Spicy Yakitori Chicken
Add shichimi togarashi or a small amount of chilli paste to the tare, or simply dust the finished skewers heavily with spice blend. Keep the heat balanced against the sweetness of the glaze rather than letting one overwhelm the other.
Garlic Yakitori
Add a few sliced garlic cloves to the tare while it reduces, then strain before use. The garlic infuses the sauce with a deeper savoury flavour without being too sharp. Works well paired with a shio finish at the table.
Sesame Yakitori
Press toasted sesame seeds into the glazed chicken during the final minute of cooking, or scatter them generously over the finished skewers. The sesame adds a bit of texture and a nutty flavour that holds up well against the tare.
Can You Make Yakitori Chicken Without a BBQ?
Using an Oven Grill or Broiler
The grill or broiler element of a domestic oven gets close to the direct, intense heat of a barbecue. Position the skewers as close to the element as your rack allows and turn them regularly. The main limitation is that you don’t get quite the same smoky flavour from an oven element, but the texture and glaze can be very close to the barbecue version.
Using a Stovetop Grill Pan
A cast iron or heavy ridged grill pan over high heat is a reasonable alternative. Work in batches to avoid crowding — too many skewers at once will bring the pan temperature down and cause steaming rather than grilling. Turn regularly and apply the tare in the final 2–3 minutes. The grill marks won’t hurt either.
Using an Air Fryer
An air fryer works well for smaller batches. Arrange the skewers in a single layer without overlapping. Set the temperature to 200°C and cook for approximately 15–18 minutes, turning halfway through. Add the tare during the last 3–4 minutes of cooking, then brush with a little extra finishing tare once the skewers come out. The circulating air in an air fryer helps develop a reasonable amount of colour on the chicken, though the char will be more subtle than a grill.
How to Store and Reheat Yakitori
Storing Leftover Yakitori
Allow the cooked skewers to cool to room temperature promptly after serving — don’t leave them out for more than two hours. Store the chicken in an airtight container in the refrigerator and consume within 2–3 days. Keep any unused tare in a separate sealed container.
You can remove the chicken from the skewers before storing if that makes the container situation easier.
Reheating Yakitori
Reheat gently to avoid drying the chicken out. An oven at 160°C for 8–10 minutes works well, as does an air fryer at the same temperature. A covered pan over low heat with a splash of water is another option.
Once reheated, brush the chicken with a little fresh finishing tare to bring back some of the glaze. This makes a significant difference to the quality of the reheated result.
Can You Freeze Cooked Yakitori?
Yes — cooked chicken thigh freezes reasonably well. Remove the skewers before freezing, allow the chicken to cool fully, then transfer to an airtight freezer bag or container. Freeze for up to two months.
Thaw overnight in the refrigerator and reheat as described above. The texture may be slightly softer after freezing, but the flavour holds well. Add fresh tare when serving to bring the glaze back.
Frequently Asked Questions About Yakitori Chicken Thighs
What does momo mean in yakitori?
Momo means chicken thigh in the context of Japanese yakitori. It refers specifically to thigh meat and is one of the most popular cuts on any yakitori menu because of its juiciness and flavour.
Are chicken thighs better than chicken breast for yakitori?
For most people, yes. Thigh meat has more natural fat, which keeps it moist during high-heat grilling and helps it absorb and hold the tare glaze. Breast meat can be used, but it’s more prone to drying out during the time it takes to develop proper colour and caramelisation.
Can I make yakitori with boneless chicken thighs?
Yes — boneless thighs are actually the easiest to work with. They’re straightforward to trim and cut into even pieces, and there’s no need to work around the bone when threading onto skewers. Both skin-on and skinless boneless thighs work well.
What is yakitori tare made from?
Traditional yakitori tare is made from soy sauce, mirin, sake and sugar, simmered together and reduced until glossy and slightly thick. Some versions add aromatics like ginger, garlic or spring onion tops during the reduction. For a halal-friendly version, substitute the sake with a mixture of rice wine vinegar, water and a small amount of extra sugar, and use a non-alcoholic mirin alternative.
Can I make yakitori without sake?
Yes. Sake contributes depth and a mild umami quality to the tare, but it can be replaced. A combination of rice wine vinegar with water and a small increase in sugar works as a substitute. The flavour profile will be slightly different — a touch more acidic and a little less rounded — but the end result is still very good.
Can I cook yakitori in the oven?
Yes. Set the oven to 200°C fan-forced, place the skewers on a wire rack over a lined tray, and cook for 20–25 minutes, turning halfway through. Apply the tare during the last 5–8 minutes and finish under the grill/broiler element briefly for colour and char.
Can I make yakitori in an air fryer?
Yes. An air fryer at 200°C works well for smaller batches. Cook for 15–18 minutes, turning halfway through, and add the tare in the final 3–4 minutes. Finish with a brush of clean tare once the skewers are out of the fryer.
How long does chicken thigh yakitori take to cook?
On a barbecue or under a grill, chicken thigh skewers typically take 12–16 minutes, depending on the size of the pieces and the heat level. Oven cooking at 200°C takes around 20–25 minutes. Always confirm doneness with a thermometer rather than relying on timing alone.
What temperature should chicken reach when cooked?
Chicken should reach an internal temperature of 75°C at the thickest point. Use a meat thermometer and check the thickest piece on the skewer.
How do I stop yakitori sauce from burning?
Apply the tare only during the final stages of cooking, once the chicken is mostly cooked through. Keep the heat at medium-high rather than extreme high during the glazing phase, and turn the skewers frequently to prevent the sauce from sitting too long in one spot.
Can I prepare yakitori ahead of time?
Yes. The tare can be made up to a week in advance and stored in the refrigerator. The chicken can be trimmed, cut and patted dry ahead of time — store it covered in the fridge for up to 24 hours before threading and cooking. Threading the skewers in advance is also an option; keep them covered and refrigerated until needed.
Recipe Card: Yakitori Chicken Thighs (Momo Yakitori)
Recipe Overview
| Prep Time | 20 minutes (plus 30 minutes soaking) |
| Cook Time | 15–20 minutes |
| Total Time | Approximately 1 hour (including soaking) |
| Servings | 4 |
| Difficulty | Easy |
| Cooking Method | Grill / BBQ / Broiler / Oven |
| Cuisine | Japanese |
Ingredients
For the chicken skewers:
- 800 g free-range chicken thighs, boneless
- 4–6 spring onion stalks (optional)
- 12 bamboo skewers, soaked in cold water for 30 minutes
For the yakitori tare:
- 80 ml soy sauce
- 60 ml mirin (or non-alcoholic alternative)
- 60 ml sake (or substitute: 40 ml rice wine vinegar + 20 ml water + 1 tsp extra sugar)
- 2 tablespoons brown sugar or caster sugar
- 2 slices fresh ginger (optional)
- 1 garlic clove, lightly crushed (optional)
- 2–3 spring onion tops (optional)
Garnishes (optional):
- Shichimi togarashi (Japanese Spice Mix)
- Sliced spring onions
- Toasted sesame seeds
- Lemon wedges
Instructions
- Soak the skewers. Place bamboo skewers in cold water and soak for at least 30 minutes.
- Make the tare. Combine soy sauce, mirin, sake (or substitute), and sugar in a small saucepan. Add aromatics if using. Stir to dissolve the sugar, then bring to a gentle simmer over medium heat. Reduce for 10–12 minutes until slightly thick and glossy. Strain and divide into two portions — one for basting, one reserved for serving. Set aside to cool.
- Prepare the chicken. Trim the thighs, removing any tough connective pieces but keeping some natural fat. Cut into 3–4 cm pieces. Pat dry with paper towels.
- Thread the skewers. Thread 4–5 pieces of chicken per skewer, keeping pieces snug but not compressed. Alternate with spring onion if using.
- Preheat the grill. Heat your barbecue or grill to medium-high to high. Clean and lightly oil the grill grates if needed.
- Begin grilling. Place skewers on the grill. Turn every 1–2 minutes for even cooking.
- Continue turning. Cook until the chicken is mostly done and lightly browned on all sides — approximately 10–12 minutes.
- Apply the tare. Brush the cooking tare onto the skewers and continue turning. Apply 2–3 coats over the final 3–4 minutes, allowing each layer to caramelise before the next goes on.
- Check doneness. Check the internal temperature of the thickest piece — it should reach 75°C. Remove from the heat.
- Rest briefly. Allow the skewers to rest for 1–2 minutes before serving.
- Garnish and serve. Brush with a little finishing tare, scatter with sliced spring onions and sesame seeds, and serve with lemon wedges and shichimi togarashi on the side.
Recipe Notes
- Don’t apply the tare too early — the sugar will burn before the chicken is cooked through.
- Keep chicken pieces consistently sized for even cooking.
- Don’t overcrowd the grill — leave space between skewers for heat circulation.
- Reserve the finishing tare in a clean bowl before cooking begins; never use the cooking tare at the table.
- Use a meat thermometer to confirm doneness. 75°C at the thickest point is the target.
Why Start With A Place 2 Meat Free Range Chicken Thighs?
In a recipe this simple, the chicken is doing most of the work. There are only a handful of ingredients in the tare, and the cooking technique is straightforward — which means the quality of the meat is exactly what you taste in the finished skewer.
That’s why it’s worth starting with something decent. A Place 2 Meat stocks fresh, free-range chicken thighs. No additives, no hormone treatments, and no sitting in a transport chain longer than necessary — just properly sourced chicken that cooks and tastes the way chicken should.
Their free-range chicken thighs are available online and suit everything from momo yakitori to everyday chicken dinners. If you’re in Brisbane and want to skip the supermarket, ordering directly from A Place 2 Meat is a straightforward way to get fresher meat delivered to your door across Brisbane.
🥩 Grill Authentic Yakitori Skewers at Home
Pick up hand-trimmed chicken thigh, tenderloin, or house-made skewers from your local Newmarket butcher. 100% halal certified and delivered fresh.
Related Articles: Teriyaki Chicken | Beef Teppanyaki